
VMware
Automation: Bulk Create and Delete VM Snapshots Across Linked vCenters | Lazy Admin Blog

In a large environment, taking snapshots before a major patch or application update is a standard safety net. But if you have servers spread across multiple vCenters in Linked Mode (e.g., Datacenter1 and Datacenter2), clicking through the vSphere Client is a waste of time.
Today, I’m sharing a “Lazy Admin” script that allows you to bulk create, check, and remove snapshots using a simple CSV list.
Prerequisites
- VMware PowerCLI: Ensure the PowerCLI module is installed on the machine running the script.
- CSV Setup: Create a file named
snapshot_servers.csvinC:\Temp\VMSnapshots\.
The CSV should look like this: | Host | Location | | :— | :— | | Server01 | Datacenter1 | | Server02 | Datacenter2 |
Part 1: Creating Snapshots
- Open PowerShell ISE with vCenter Administrator credentials.
- Load the functions by running the full script (provided below).
- Run the following command:
Create-VMSnapshots -SS_CSV "C:\Temp\VMSnapshots\snapshot_servers.csv" -SS_Name "Pre-Patching" -SS_Description "Requested by App Team"
The script will iterate through your CSV and create snapshots sequentially. You can monitor the progress in the vSphere Tasks console.
Part 2: Deleting Snapshots
Once your changes are verified, don’t let those snapshots linger and bloat your datastores! To remove them:
- Use the same
snapshot_servers.csvlist. - Run the following command:
Remove-VMSnapshots -SS_CSV "C:\Temp\VMSnapshots\snapshot_servers.csv"
Note: This is a sequential script; it will wait for one snapshot removal to finish before moving to the next to avoid pinning your storage I/O.
The Script: VMSnapshots.ps1
Save this code to C:\Temp\VMSnapshots\VMSnapshots.ps1.
function Create-VMSnapshots { param ( [string]$SS_CSV = $(Read-Host "Enter path to CSV"), [string]$SS_Name = $(Read-Host "Enter name for snapshots"), [string]$SS_Description = $(Read-Host "Enter description for snapshots") ) # Import VMware PowerCLI Module If ( !(Get-Module -Name VMware.VimAutomation.Core -ErrorAction SilentlyContinue) ) { import-module VMware.VimAutomation.Core } $Servers = Import-CSV $SS_CSV $WLM_vCenter = Connect-VIServer vCenter1 -WarningAction SilentlyContinue $EDN_vCenter = Connect-VIServer vCenter2 -WarningAction SilentlyContinue ForEach($Server in $Servers){ If($Server.Location -eq 'Datacenter1'){ New-Snapshot -VM $Server.Host -Name $SS_Name -Description $SS_Description -Quiesce -Server $WLM_vCenter -WarningAction SilentlyContinue } ElseIf($Server.Location -eq 'Datacenter2'){ New-Snapshot -VM $Server.Host -Name $SS_Name -Description $SS_Description -Quiesce -Server $EDN_vCenter -WarningAction SilentlyContinue } } }function Check-VMSnapshots { param ( [string]$SS_CSV = $(Read-Host "Enter path to CSV"), [string]$SS_Name = $(Read-Host "Enter snapshot name") ) # Import VMware PowerCLI Module If ( !(Get-Module -Name VMware.VimAutomation.Core -ErrorAction SilentlyContinue) ) { import-module VMware.VimAutomation.Core } $Servers = Import-CSV $SS_CSV $WLM_vCenter = Connect-VIServer vCenter1 -WarningAction SilentlyContinue $EDN_vCenter = Connect-VIServer vCenter2 -WarningAction SilentlyContinue ForEach($Server in $Servers){ If($Server.Location -eq 'Datacenter1'){ Get-Snapshot -VM $Server.Host -Name $SS_Name -Server $WLM_vCenter | Select VM, Name, @{ n="SpaceUsedGB"; e={[math]::round( $_.SizeGB )}} -WarningAction SilentlyContinue } ElseIf($Server.Location -eq 'Datacenter2'){ Get-Snapshot -VM $Server.Host -Name $SS_Name -Server $EDN_vCenter | Select VM, Name, @{ n="SpaceUsedGB"; e={[math]::round( $_.SizeGB )}} -WarningAction SilentlyContinue } } } function Remove-VMSnapshots { param ( [string]$SS_CSV = $(Read-Host "Enter path to CSV") ) # Import VMware PowerCLI Module If ( !(Get-Module -Name VMware.VimAutomation.Core -ErrorAction SilentlyContinue) ) { import-module VMware.VimAutomation.Core } $Servers = Import-CSV $SS_CSV $WLM_vCenter = Connect-VIServer vCenter1 -WarningAction SilentlyContinue $EDN_vCenter = Connect-VIServer vCenter2 -WarningAction SilentlyContinue ForEach($Server in $Servers){ If($Server.Location -eq 'Datacenter1'){ Get-Snapshot $Server.Host -Server $WLM_vCenter | Remove-Snapshot -Confirm:$false -WarningAction SilentlyContinue } ElseIf($Server.Location -eq 'Datacenter2'){ Get-Snapshot $Server.Host -Server $EDN_vCenter | Remove-Snapshot -Confirm:$false -WarningAction SilentlyContinue } } }
Build Your Own VM Snapshot GUI with PowerShell | Lazy Admin Blog

The ultimate “I’m too busy for CLI” tool for VMware Admins.
Today, I am sharing a complete PowerShell tool that creates a custom Windows Form to manage bulk snapshots across multiple vCenters, complete with a progress bar and an automated HTML email report.
🚀 What this tool does:
- Multi-vCenter Support: Toggle between environments with simple radio buttons.
- Bulk Processing: Paste a list of hostnames directly into the text box.
- Smart Memory Handling: Choose whether to include VM memory in the snapshot.
- Progress Tracking: A real-time progress bar so you know exactly when it’s safe to go grab another coffee.
- Automated Reporting: Generates a CSV on your desktop and sends a formatted HTML email to your team.
The Script: VM-Snapshot-GUI.ps1
Lazy Admin Note: Before running, make sure you have the VMware PowerCLI module installed. Change the
"SMTP Server"and"From@domain.com"strings in the script to match your environment.
<!-- wp:syntaxhighlighter/code -->
<pre class="wp-block-syntaxhighlighter-code">Function Snapshot()
{
Add-Type -AssemblyName System.Drawing
Add-Type -AssemblyName System.Windows.Forms
# Create the Main form.
$form = New-Object System.Windows.Forms.Form
$form.Text = "VM Snapshot"
$form.Size = New-Object System.Drawing.Size(650,320)
$form.FormBorderStyle = 'FixedSingle'
$form.StartPosition = "CenterScreen"
$form.AutoSizeMode = 'GrowAndShrink'
$form.Topmost = $True
$form.ShowInTaskbar = $true
# Create the Email form.
$Emailform = New-Object System.Windows.Forms.Form
$Emailform.Text = "Email Report"
$Emailform.Size = New-Object System.Drawing.Size(420,200)
$Emailform.FormBorderStyle = 'FixedSingle'
$form.StartPosition = "CenterScreen"
$Emailform.AutoSizeMode = 'GrowAndShrink'
$Emailform.Topmost = $True
$Emailform.ShowInTaskbar = $true
#Select vCenter
$groupBox = New-Object System.Windows.Forms.GroupBox
$groupBox.Location = New-Object System.Drawing.Size(10,20)
$groupBox.size = New-Object System.Drawing.Size(180,80)
$groupBox.text = "Select the vCenter:"
$Form.Controls.Add($groupBox)
$RadioButton1 = New-Object System.Windows.Forms.RadioButton
$RadioButton1.Location = new-object System.Drawing.Point(15,15)
$RadioButton1.size = New-Object System.Drawing.Size(160,25)
$RadioButton1.Checked = $true
$RadioButton1.Text = "vCenter 1"
$groupBox.Controls.Add($RadioButton1)
$RadioButton2 = New-Object System.Windows.Forms.RadioButton
$RadioButton2.Location = new-object System.Drawing.Point(15,40)
$RadioButton2.size = New-Object System.Drawing.Size(160,25)
$RadioButton2.Text = "vCenter 2"
$groupBox.Controls.Add($RadioButton2)
#Select Snapshot memory
$groupBox1 = New-Object System.Windows.Forms.GroupBox
$groupBox1.Location = New-Object System.Drawing.Size(200,20)
$groupBox1.size = New-Object System.Drawing.Size(180,80)
$groupBox1.text = "Snapshot Memory:"
$Form.Controls.Add($groupBox1)
$RadioButton3 = New-Object System.Windows.Forms.RadioButton
$RadioButton3.Location = new-object System.Drawing.Point(15,15)
$RadioButton3.size = New-Object System.Drawing.Size(160,25)
$RadioButton3.Checked = $true
$RadioButton3.Text = "Snapshot Without Memory"
$groupBox1.Controls.Add($RadioButton3)
$RadioButton4 = New-Object System.Windows.Forms.RadioButton
$RadioButton4.Location = new-object System.Drawing.Point(15,40)
$RadioButton4.size = New-Object System.Drawing.Size(160,25)
$RadioButton4.Text = "Snapshot With Memory"
$groupBox1.Controls.Add($RadioButton4)
$label = New-Object System.Windows.Forms.Label
$label.Location = New-Object System.Drawing.Size(390,20)
$label.Size = New-Object System.Drawing.Size(280,20)
$label.AutoSize = $true
$label.Text = "Enter Hostname Here..."
# Create the TextBox used to capture the user's text.
$textBox = New-Object System.Windows.Forms.TextBox
$textBox.Location = New-Object System.Drawing.Size(390,40)
$textBox.Size = New-Object System.Drawing.Size(130,230)
$textBox.AcceptsReturn = $true
$textBox.AcceptsTab = $false
$textBox.Multiline = $true
$textBox.ScrollBars = 'Both'
$textbox.CharacterCasing='Upper'
# Getting Input for Snapshot SR#, Snapshot Name, Snapshot Description.
$SR_label = New-Object System.Windows.Forms.Label
$SR_label.Location = New-Object System.Drawing.Size(15,130)
$SR_label.Size = New-Object System.Drawing.Size(280,20)
$SR_label.AutoSize = $true
$SR_label.Text = "*SR#"
$SR_textBox = New-Object System.Windows.Forms.TextBox
$SR_textBox.Location = New-Object System.Drawing.Size(150,130)
$SR_textBox.Size = New-Object System.Drawing.Size(130,20)
$SR_textBox.AcceptsReturn = $true
$SR_textBox.AcceptsTab = $false
$SR_textbox.CharacterCasing='Upper'
$SN_label = New-Object System.Windows.Forms.Label
$SN_label.Location = New-Object System.Drawing.Size(15,160)
$SN_label.Size = New-Object System.Drawing.Size(280,20)
$SN_label.AutoSize = $true
$SN_label.Text = "*Snapshot Name"
$SN_textBox = New-Object System.Windows.Forms.TextBox
$SN_textBox.Location = New-Object System.Drawing.Size(150,160)
$SN_textBox.Size = New-Object System.Drawing.Size(200,20)
$SN_textBox.AcceptsReturn = $true
$SN_textBox.AcceptsTab = $false
#$SN_textbox.CharacterCasing='Upper'
$SD_label = New-Object System.Windows.Forms.Label
$SD_label.Location = New-Object System.Drawing.Size(15,190)
$SD_label.Size = New-Object System.Drawing.Size(280,20)
$SD_label.AutoSize = $true
$SD_label.Text = "Snapshot Description"
$SD_textBox = New-Object System.Windows.Forms.TextBox
$SD_textBox.Location = New-Object System.Drawing.Size(150,190)
$SD_textBox.Size = New-Object System.Drawing.Size(200,50)
$SD_textBox.AcceptsReturn = $true
$SD_textBox.AcceptsTab = $false
$SD_textBox.Multiline = $true
$SD_textBox.ScrollBars = 'Both'
#$SD_textbox.CharacterCasing='Upper'
#Create the Hardening Button.
$HButton = New-Object System.Windows.Forms.Button
$HButton.Location = New-Object System.Drawing.Size(540,40)
$HButton.Size = New-Object System.Drawing.Size(100,40)
$HButton.Text = "Take Snapshot"
#Create the Report Button.
$RButton = New-Object System.Windows.Forms.Button
$RButton.Location = New-Object System.Drawing.Size(540,90)
$RButton.Size = New-Object System.Drawing.Size(100,40)
$RButton.Text = "Generate Report"
#Create the Report Button.
$EmailButton = New-Object System.Windows.Forms.Button
$EmailButton.Location = New-Object System.Drawing.Size(540,140)
$EmailButton.Size = New-Object System.Drawing.Size(100,40)
$EmailButton.Text = "Send Email"
#Create the Progress-Bar.
$label1 = New-Object System.Windows.Forms.Label
$label1.Location = New-Object System.Drawing.Size(20,230)
$label1.Size = New-Object System.Drawing.Size(280,20)
$label1.AutoSize = $true
$label1.Text = "Progress..."
$PB = New-Object System.Windows.Forms.ProgressBar
$PB.Name = "PowerShellProgressBar"
$PB.Value = 0
$PB.Style="Continuous"
$System_Drawing_Size = New-Object System.Drawing.Size
$System_Drawing_Size.Width = 200 - 40
$System_Drawing_Size.Height = 20
$PB.Size = $System_Drawing_Size
$PB.Left = 20
$PB.Top = 250
#Initiate Snapshot
$HButton.Add_Click(
{
$report= @()
$counter = 0
If ($SR_textBox.TextLength -ne 0 -and $SN_textBox.TextLength -ne 0)
{
$S_Name= $SR_textBox.text+ " - " +$SN_textBox.text
}
Else{
[System.Windows.Forms.MessageBox]::Show("SR# or Snapshot Name cannot be blank", "Info")
return
}
If ($textbox.TextLength -eq 0)
{
[System.Windows.Forms.MessageBox]::Show("Server List is empty", "Info")
return
}
[System.Windows.Forms.MessageBox]::Show("Sit back and relax while Snapshot is taken !!!", "VM Snapshot")
$ServerList=$textbox.Text.Split("`n")|%{$_.trim()}
Foreach ($vm in $ServerList)
{
if($vm -eq "")
{
$counter++
[Int]$Percentage = ($Counter/$ServerList.Count)*100
$PB.Value = $Percentage
continue
}
if ($RadioButton1.Checked -eq $True)
{
Add-PSSnapin VMware.VimAutomation.Core
Connect-VIServer -Server vCenter1
}
if ($RadioButton2.Checked -eq $True)
{
Add-PSSnapin VMware.VimAutomation.Core
Connect-VIServer -Server vCenter2
}
$Exists = get-vm -name $vm -ErrorAction SilentlyContinue
If ($Exists)
{
If ($RadioButton3.Checked -eq $True)
{
Get-VM $vm |New-snapshot -Name $S_Name -Description $SD_textBox.Text
$rep = Get-VM $vm | Get-Snapshot | Select-Object @{Name='VM';Expression={$_.vm}},@{Name='Snapshot_Name';Expression={$_.name}},@{Name='Description';Expression={$_.Description}},@{Name='Created';Expression={$_.Created}},@{Name='Remarks';Expression={""}}
$report = $report + $rep
}
If ($RadioButton4.Checked -eq $True)
{
Get-VM $vm |New-snapshot -Name $S_Name -Description $SD_textBox.Text -Memory
$rep = Get-VM $vm | Get-Snapshot | Select-Object @{Name='VM';Expression={$_.vm}},@{Name='Snapshot_Name';Expression={$_.name}},@{Name='Description';Expression={$_.Description}},@{Name='Created';Expression={$_.Created}},@{Name='Remarks';Expression={""}}
$report = $report + $rep
}
}
If (!$Exists)
{
$row= New-Object PSObject -Property @{VM = $vm;Snapshot_Name = "";Description = "";Created = "";Remarks="Server not Found"}
$report += $row
}
$counter++
[Int]$Percentage = ($Counter/$ServerList.Count)*100
$PB.Value = $Percentage
}
[System.Windows.Forms.MessageBox]::Show("Snapshot taken successfully" , "Report Generation")
$report |Select-object @{Name="HOSTNAME"; Expression={$_.VM}},@{Name="Snapshot_Name"; Expression={$_.Snapshot_Name}},@{Name="Description"; Expression={$_.Description}},@{Name="Created: Date & Time"; Expression={$_.Created}},@{Name='Remarks';Expression={$_.Remarks}}| Export-Csv $file -NoTypeInformation
})
#Report Generation
$RButton.Add_Click(
{
ii $path
})
#Send Email
$EmailButton.Add_Click(
{
#Create Label
$ToLabel = New-Object System.Windows.Forms.Label
$ToLabel.Location = New-Object System.Drawing.Size(20,20)
$ToLabel.Size = New-Object System.Drawing.Size(100,20)
$ToLabel.AutoSize = $true
$ToLabelFont = New-Object Drawing.Font("Times New Roman",12,[System.Drawing.FontStyle]::Bold)
$ToLabel.Font = $ToLabelFont
$ToLabel.Text = "*To:"
$CcLabel = New-Object System.Windows.Forms.Label
$CcLabel.Location = New-Object System.Drawing.Size(20,50)
$CcLabel.Size = New-Object System.Drawing.Size(100,20)
$CcLabel.AutoSize = $true
$CcLabelFont = New-Object Drawing.Font("Times New Roman",12,[System.Drawing.FontStyle]::Bold)
$CcLabel.Font = $CcLabelFont
$CcLabel.Text = "Cc: (Optional)"
#Create the TextBox Email Address.
$ToBox = New-Object System.Windows.Forms.TextBox
$ToBox.Location = New-Object System.Drawing.Size(140,20)
$ToBox.Size = New-Object System.Drawing.Size(250,20)
$ToBoxFont = New-Object Drawing.Font("Times New Roman",8)
$ToBox.Font=$ToBoxFont
$ToBox.AcceptsReturn = $true
$ToBox.AcceptsTab = $false
#$ToBox.text=""
$ToBox.CharacterCasing='lower'
$CcBox = New-Object System.Windows.Forms.TextBox
$CcBox.Location = New-Object System.Drawing.Size(140,50)
$CcBox.Size = New-Object System.Drawing.Size(250,20)
$CcBoxFont = New-Object Drawing.Font("Times New Roman",8)
$CcBox.Font=$CcBoxFont
$CcBox.AcceptsReturn = $true
$CcBox.AcceptsTab = $false
$CcBox.text=""
$CcBox.CharacterCasing='lower'
#Create Email Send Button
$SendButton = New-Object System.Windows.Forms.Button
$SendButton.Location = New-Object System.Drawing.Size(20,100)
$SendButton.Size = New-Object System.Drawing.Size(100,40)
$ButtonFont = New-Object Drawing.Font("Times New Roman",8,[System.Drawing.FontStyle]::Bold)
$SendButton.Font=$ButtonFont
$SendButton.Text = "Send Email"
$CancelButton = New-Object System.Windows.Forms.Button
$CancelButton.Location = New-Object System.Drawing.Size(150,100)
$CancelButton.Size = New-Object System.Drawing.Size(100,40)
$CancelButton.Font=$ButtonFont
$CancelButton.Text = "Cancel"
$Emailform.Controls.Add($ToLabel)
$Emailform.Controls.Add($CcLabel)
$Emailform.Controls.Add($ToBox)
$Emailform.Controls.Add($CCBox)
$Emailform.Controls.Add($SendButton)
$Emailform.Controls.Add($CancelButton)
$SendButton.Add_Click(
{
If ($ToBox.Text.Length -eq 0)
{
[System.Windows.Forms.MessageBox]::Show("Email address cannot be empty" , "Email Info")
return
}
#---------------------------------------------------------------------
# Generate the HTML report and output to file
#---------------------------------------------------------------------
$head = "<style>"
$head = $head + "BODY{background-color:white;}"
$head = $head + "TABLE{border-width: 1px;border-style: solid;border-color: black;border-collapse: collapse;}"
$head = $head + "TH{border-width: 1px;padding: 0px;border-style: solid;border-color: black;background-color:#778899}"
$head = $head + "TD{border-width: 1px;padding: 0px;border-style: solid;border-color: black}"
$head = $head + "</style>"
# SMTP info
$Toemail=$ToBox.Text
$strTo=$Toemail
$strCc=$CCBox.Text
$strSubject = "Snapshot Taken : $S_Name"
$StrMsg="Hi All, <br>Snapshot has been taken successfully for below list of servers <br><br>"
$strBody = "Attached is the list of Snapshots"
$strMail = $strmsg
# Write the output to an HTML file
$strOutFile = $Path+"email.html"
$ComputerName=(Get-WmiObject -Class Win32_ComputerSystem -Property Name).Name
Get-Content -Path $File |ConvertFrom-CSV | ConvertTo-HTML -Head $head -Body $StrMsg | Out-File $StrOutFile
# Mail the output file
$msg = new-object Net.Mail.MailMessage
$att = new-object Net.Mail.Attachment($File)
$smtp = new-object Net.Mail.SmtpClient("SMTP Server")
$msg.From ="From@domain.com"
$msg.To.Add($strTo)
If ($strCc.Length -ne 0)
{
$msg.cc.Add($strcc)
}
$msg.Subject = $strSubject
$msg.IsBodyHtml = 1
$msg.Body = Get-Content $strOutFile
$msg.Attachments.Add($att)
$smtp.Send($msg)
[System.Windows.Forms.MessageBox]::Show("Email Send !!!","Info")
$Emailform.close()
})
$CancelButton.Add_Click(
{
$Emailform.close()
})
$Emailform.Add_Shown({$Emailform.Activate()})
$Emailform.ShowDialog() > $null
})
# Add all of the controls to the form.
$form.Controls.Add($label)
$form.Controls.Add($textBox)
$form.Controls.Add($groupBox)
$form.Controls.Add($groupBox1)
$form.Controls.Add($RButton)
$form.Controls.Add($HButton)
$form.Controls.Add($label1)
$form.Controls.Add($SR_label)
$form.Controls.Add($SR_textBox)
$form.Controls.Add($SN_label)
$form.Controls.Add($SN_textBox)
$form.Controls.Add($SD_label)
$form.Controls.Add($SD_textBox)
$form.Controls.Add($PB)
$form.Controls.Add($EmailButton)
# Initialize and show the form.
$form.Add_Shown({$form.Activate()})
$form.ShowDialog() > $null
}
Set-ExecutionPolicy unrestricted -Force
$date=get-Date -format "ddMMyy_HHmm"
$ComputerName=(Get-WmiObject -Class Win32_ComputerSystem -Property Name).Name
$Path=[System.Environment]::GetFolderPath([System.Environment+SpecialFolder]::Desktop)+"\Report\"
If ((Test-Path $Path) -eq $false)
{
New-Item $Path -type directory
}
New-Item -ErrorAction Ignore -ItemType directory -Path Report
$File=$Path + "SnapshotReport_$date.csv"
Snapshot</pre>
<!-- /wp:syntaxhighlighter/code -->
🛠️ How to use the GUI:
- Select your vCenter: Choose which environment the VMs live in.
- Snapshot Specs: Enter the SR# (Service Request) and a Name. These are mandatory to keep your environment organized.
- Input Servers: Paste your list of servers (one per line) into the right-hand text box.
- Hit ‘Take Snapshot’: The tool will cycle through the list. If a server isn’t found, it won’t crash; it just marks it as “Server not Found” in your final report.
- Send Email: Once finished, click ‘Send Email’ to notify your team that the work is done.
Why this belongs in your toolkit:
The “Lazy Admin” way is about standardization. By using this GUI, every snapshot taken by your team will follow the same naming convention: SR# - Snapshot Name. No more guessing what “Snap1” or “Update_v2” means six months from now.
🛠️ The Refactor: Adding the “Cleanup” Tab
In the code below, I’ve introduced the TabControl and TabPage classes. The new Cleanup Tab includes a feature every admin needs: Age-Based Filtering. It can scan for snapshots older than 2 or 3 days and wipe them in bulk.
<!-- wp:syntaxhighlighter/code -->
<pre class="wp-block-syntaxhighlighter-code">Function Snapshot()
{
Add-Type -AssemblyName System.Drawing
Add-Type -AssemblyName System.Windows.Forms
# Create the Main form.
$form = New-Object System.Windows.Forms.Form
$form.Text = "VM Snapshot"
$form.Size = New-Object System.Drawing.Size(650,320)
$form.FormBorderStyle = 'FixedSingle'
$form.StartPosition = "CenterScreen"
$form.AutoSizeMode = 'GrowAndShrink'
$form.Topmost = $True
$form.ShowInTaskbar = $true
# Create the Email form.
$Emailform = New-Object System.Windows.Forms.Form
$Emailform.Text = "Email Report"
$Emailform.Size = New-Object System.Drawing.Size(420,200)
$Emailform.FormBorderStyle = 'FixedSingle'
$form.StartPosition = "CenterScreen"
$Emailform.AutoSizeMode = 'GrowAndShrink'
$Emailform.Topmost = $True
$Emailform.ShowInTaskbar = $true
#Select vCenter
$groupBox = New-Object System.Windows.Forms.GroupBox
$groupBox.Location = New-Object System.Drawing.Size(10,20)
$groupBox.size = New-Object System.Drawing.Size(180,80)
$groupBox.text = "Select the vCenter:"
$Form.Controls.Add($groupBox)
$RadioButton1 = New-Object System.Windows.Forms.RadioButton
$RadioButton1.Location = new-object System.Drawing.Point(15,15)
$RadioButton1.size = New-Object System.Drawing.Size(160,25)
$RadioButton1.Checked = $true
$RadioButton1.Text = "vCenter 1"
$groupBox.Controls.Add($RadioButton1)
$RadioButton2 = New-Object System.Windows.Forms.RadioButton
$RadioButton2.Location = new-object System.Drawing.Point(15,40)
$RadioButton2.size = New-Object System.Drawing.Size(160,25)
$RadioButton2.Text = "vCenter 2"
$groupBox.Controls.Add($RadioButton2)
#Select Snapshot memory
$groupBox1 = New-Object System.Windows.Forms.GroupBox
$groupBox1.Location = New-Object System.Drawing.Size(200,20)
$groupBox1.size = New-Object System.Drawing.Size(180,80)
$groupBox1.text = "Snapshot Memory:"
$Form.Controls.Add($groupBox1)
$RadioButton3 = New-Object System.Windows.Forms.RadioButton
$RadioButton3.Location = new-object System.Drawing.Point(15,15)
$RadioButton3.size = New-Object System.Drawing.Size(160,25)
$RadioButton3.Checked = $true
$RadioButton3.Text = "Snapshot Without Memory"
$groupBox1.Controls.Add($RadioButton3)
$RadioButton4 = New-Object System.Windows.Forms.RadioButton
$RadioButton4.Location = new-object System.Drawing.Point(15,40)
$RadioButton4.size = New-Object System.Drawing.Size(160,25)
$RadioButton4.Text = "Snapshot With Memory"
$groupBox1.Controls.Add($RadioButton4)
$label = New-Object System.Windows.Forms.Label
$label.Location = New-Object System.Drawing.Size(390,20)
$label.Size = New-Object System.Drawing.Size(280,20)
$label.AutoSize = $true
$label.Text = "Enter Hostname Here..."
# Create the TextBox used to capture the user's text.
$textBox = New-Object System.Windows.Forms.TextBox
$textBox.Location = New-Object System.Drawing.Size(390,40)
$textBox.Size = New-Object System.Drawing.Size(130,230)
$textBox.AcceptsReturn = $true
$textBox.AcceptsTab = $false
$textBox.Multiline = $true
$textBox.ScrollBars = 'Both'
$textbox.CharacterCasing='Upper'
# Getting Input for Snapshot SR#, Snapshot Name, Snapshot Description.
$SR_label = New-Object System.Windows.Forms.Label
$SR_label.Location = New-Object System.Drawing.Size(15,130)
$SR_label.Size = New-Object System.Drawing.Size(280,20)
$SR_label.AutoSize = $true
$SR_label.Text = "*SR#"
$SR_textBox = New-Object System.Windows.Forms.TextBox
$SR_textBox.Location = New-Object System.Drawing.Size(150,130)
$SR_textBox.Size = New-Object System.Drawing.Size(130,20)
$SR_textBox.AcceptsReturn = $true
$SR_textBox.AcceptsTab = $false
$SR_textbox.CharacterCasing='Upper'
$SN_label = New-Object System.Windows.Forms.Label
$SN_label.Location = New-Object System.Drawing.Size(15,160)
$SN_label.Size = New-Object System.Drawing.Size(280,20)
$SN_label.AutoSize = $true
$SN_label.Text = "*Snapshot Name"
$SN_textBox = New-Object System.Windows.Forms.TextBox
$SN_textBox.Location = New-Object System.Drawing.Size(150,160)
$SN_textBox.Size = New-Object System.Drawing.Size(200,20)
$SN_textBox.AcceptsReturn = $true
$SN_textBox.AcceptsTab = $false
#$SN_textbox.CharacterCasing='Upper'
$SD_label = New-Object System.Windows.Forms.Label
$SD_label.Location = New-Object System.Drawing.Size(15,190)
$SD_label.Size = New-Object System.Drawing.Size(280,20)
$SD_label.AutoSize = $true
$SD_label.Text = "Snapshot Description"
$SD_textBox = New-Object System.Windows.Forms.TextBox
$SD_textBox.Location = New-Object System.Drawing.Size(150,190)
$SD_textBox.Size = New-Object System.Drawing.Size(200,50)
$SD_textBox.AcceptsReturn = $true
$SD_textBox.AcceptsTab = $false
$SD_textBox.Multiline = $true
$SD_textBox.ScrollBars = 'Both'
#$SD_textbox.CharacterCasing='Upper'
#Create the Hardening Button.
$HButton = New-Object System.Windows.Forms.Button
$HButton.Location = New-Object System.Drawing.Size(540,40)
$HButton.Size = New-Object System.Drawing.Size(100,40)
$HButton.Text = "Take Snapshot"
#Create the Report Button.
$RButton = New-Object System.Windows.Forms.Button
$RButton.Location = New-Object System.Drawing.Size(540,90)
$RButton.Size = New-Object System.Drawing.Size(100,40)
$RButton.Text = "Generate Report"
#Create the Report Button.
$EmailButton = New-Object System.Windows.Forms.Button
$EmailButton.Location = New-Object System.Drawing.Size(540,140)
$EmailButton.Size = New-Object System.Drawing.Size(100,40)
$EmailButton.Text = "Send Email"
#Create the Progress-Bar.
$label1 = New-Object System.Windows.Forms.Label
$label1.Location = New-Object System.Drawing.Size(20,230)
$label1.Size = New-Object System.Drawing.Size(280,20)
$label1.AutoSize = $true
$label1.Text = "Progress..."
$PB = New-Object System.Windows.Forms.ProgressBar
$PB.Name = "PowerShellProgressBar"
$PB.Value = 0
$PB.Style="Continuous"
$System_Drawing_Size = New-Object System.Drawing.Size
$System_Drawing_Size.Width = 200 - 40
$System_Drawing_Size.Height = 20
$PB.Size = $System_Drawing_Size
$PB.Left = 20
$PB.Top = 250
#Initiate Snapshot
$HButton.Add_Click(
{
$report= @()
$counter = 0
If ($SR_textBox.TextLength -ne 0 -and $SN_textBox.TextLength -ne 0)
{
$S_Name= $SR_textBox.text+ " - " +$SN_textBox.text
}
Else{
[System.Windows.Forms.MessageBox]::Show("SR# or Snapshot Name cannot be blank", "Info")
return
}
If ($textbox.TextLength -eq 0)
{
[System.Windows.Forms.MessageBox]::Show("Server List is empty", "Info")
return
}
[System.Windows.Forms.MessageBox]::Show("Sit back and relax while Snapshot is taken !!!", "VM Snapshot")
$ServerList=$textbox.Text.Split("`n")|%{$_.trim()}
Foreach ($vm in $ServerList)
{
if($vm -eq "")
{
$counter++
[Int]$Percentage = ($Counter/$ServerList.Count)*100
$PB.Value = $Percentage
continue
}
if ($RadioButton1.Checked -eq $True)
{
Add-PSSnapin VMware.VimAutomation.Core
Connect-VIServer -Server vCenter1
}
if ($RadioButton2.Checked -eq $True)
{
Add-PSSnapin VMware.VimAutomation.Core
Connect-VIServer -Server vCenter2
}
$Exists = get-vm -name $vm -ErrorAction SilentlyContinue
If ($Exists)
{
If ($RadioButton3.Checked -eq $True)
{
Get-VM $vm |New-snapshot -Name $S_Name -Description $SD_textBox.Text
$rep = Get-VM $vm | Get-Snapshot | Select-Object @{Name='VM';Expression={$_.vm}},@{Name='Snapshot_Name';Expression={$_.name}},@{Name='Description';Expression={$_.Description}},@{Name='Created';Expression={$_.Created}},@{Name='Remarks';Expression={""}}
$report = $report + $rep
}
If ($RadioButton4.Checked -eq $True)
{
Get-VM $vm |New-snapshot -Name $S_Name -Description $SD_textBox.Text -Memory
$rep = Get-VM $vm | Get-Snapshot | Select-Object @{Name='VM';Expression={$_.vm}},@{Name='Snapshot_Name';Expression={$_.name}},@{Name='Description';Expression={$_.Description}},@{Name='Created';Expression={$_.Created}},@{Name='Remarks';Expression={""}}
$report = $report + $rep
}
}
If (!$Exists)
{
$row= New-Object PSObject -Property @{VM = $vm;Snapshot_Name = "";Description = "";Created = "";Remarks="Server not Found"}
$report += $row
}
$counter++
[Int]$Percentage = ($Counter/$ServerList.Count)*100
$PB.Value = $Percentage
}
[System.Windows.Forms.MessageBox]::Show("Snapshot taken successfully" , "Report Generation")
$report |Select-object @{Name="HOSTNAME"; Expression={$_.VM}},@{Name="Snapshot_Name"; Expression={$_.Snapshot_Name}},@{Name="Description"; Expression={$_.Description}},@{Name="Created: Date & Time"; Expression={$_.Created}},@{Name='Remarks';Expression={$_.Remarks}}| Export-Csv $file -NoTypeInformation
})
#Report Generation
$RButton.Add_Click(
{
ii $path
})
#Send Email
$EmailButton.Add_Click(
{
#Create Label
$ToLabel = New-Object System.Windows.Forms.Label
$ToLabel.Location = New-Object System.Drawing.Size(20,20)
$ToLabel.Size = New-Object System.Drawing.Size(100,20)
$ToLabel.AutoSize = $true
$ToLabelFont = New-Object Drawing.Font("Times New Roman",12,[System.Drawing.FontStyle]::Bold)
$ToLabel.Font = $ToLabelFont
$ToLabel.Text = "*To:"
$CcLabel = New-Object System.Windows.Forms.Label
$CcLabel.Location = New-Object System.Drawing.Size(20,50)
$CcLabel.Size = New-Object System.Drawing.Size(100,20)
$CcLabel.AutoSize = $true
$CcLabelFont = New-Object Drawing.Font("Times New Roman",12,[System.Drawing.FontStyle]::Bold)
$CcLabel.Font = $CcLabelFont
$CcLabel.Text = "Cc: (Optional)"
#Create the TextBox Email Address.
$ToBox = New-Object System.Windows.Forms.TextBox
$ToBox.Location = New-Object System.Drawing.Size(140,20)
$ToBox.Size = New-Object System.Drawing.Size(250,20)
$ToBoxFont = New-Object Drawing.Font("Times New Roman",8)
$ToBox.Font=$ToBoxFont
$ToBox.AcceptsReturn = $true
$ToBox.AcceptsTab = $false
#$ToBox.text=""
$ToBox.CharacterCasing='lower'
$CcBox = New-Object System.Windows.Forms.TextBox
$CcBox.Location = New-Object System.Drawing.Size(140,50)
$CcBox.Size = New-Object System.Drawing.Size(250,20)
$CcBoxFont = New-Object Drawing.Font("Times New Roman",8)
$CcBox.Font=$CcBoxFont
$CcBox.AcceptsReturn = $true
$CcBox.AcceptsTab = $false
$CcBox.text=""
$CcBox.CharacterCasing='lower'
#Create Email Send Button
$SendButton = New-Object System.Windows.Forms.Button
$SendButton.Location = New-Object System.Drawing.Size(20,100)
$SendButton.Size = New-Object System.Drawing.Size(100,40)
$ButtonFont = New-Object Drawing.Font("Times New Roman",8,[System.Drawing.FontStyle]::Bold)
$SendButton.Font=$ButtonFont
$SendButton.Text = "Send Email"
$CancelButton = New-Object System.Windows.Forms.Button
$CancelButton.Location = New-Object System.Drawing.Size(150,100)
$CancelButton.Size = New-Object System.Drawing.Size(100,40)
$CancelButton.Font=$ButtonFont
$CancelButton.Text = "Cancel"
$Emailform.Controls.Add($ToLabel)
$Emailform.Controls.Add($CcLabel)
$Emailform.Controls.Add($ToBox)
$Emailform.Controls.Add($CCBox)
$Emailform.Controls.Add($SendButton)
$Emailform.Controls.Add($CancelButton)
$SendButton.Add_Click(
{
If ($ToBox.Text.Length -eq 0)
{
[System.Windows.Forms.MessageBox]::Show("Email address cannot be empty" , "Email Info")
return
}
#---------------------------------------------------------------------
# Generate the HTML report and output to file
#---------------------------------------------------------------------
$head = "<style>"
$head = $head + "BODY{background-color:white;}"
$head = $head + "TABLE{border-width: 1px;border-style: solid;border-color: black;border-collapse: collapse;}"
$head = $head + "TH{border-width: 1px;padding: 0px;border-style: solid;border-color: black;background-color:#778899}"
$head = $head + "TD{border-width: 1px;padding: 0px;border-style: solid;border-color: black}"
$head = $head + "</style>"
# SMTP info
$Toemail=$ToBox.Text
$strTo=$Toemail
$strCc=$CCBox.Text
$strSubject = "Snapshot Taken : $S_Name"
$StrMsg="Hi All, <br>Snapshot has been taken successfully for below list of servers <br><br>"
$strBody = "Attached is the list of Snapshots"
$strMail = $strmsg
# Write the output to an HTML file
$strOutFile = $Path+"email.html"
$ComputerName=(Get-WmiObject -Class Win32_ComputerSystem -Property Name).Name
Get-Content -Path $File |ConvertFrom-CSV | ConvertTo-HTML -Head $head -Body $StrMsg | Out-File $StrOutFile
# Mail the output file
$msg = new-object Net.Mail.MailMessage
$att = new-object Net.Mail.Attachment($File)
$smtp = new-object Net.Mail.SmtpClient("SMTP Server")
$msg.From ="From@domain.com"
$msg.To.Add($strTo)
If ($strCc.Length -ne 0)
{
$msg.cc.Add($strcc)
}
$msg.Subject = $strSubject
$msg.IsBodyHtml = 1
$msg.Body = Get-Content $strOutFile
$msg.Attachments.Add($att)
$smtp.Send($msg)
[System.Windows.Forms.MessageBox]::Show("Email Send !!!","Info")
$Emailform.close()
})
$CancelButton.Add_Click(
{
$Emailform.close()
})
$Emailform.Add_Shown({$Emailform.Activate()})
$Emailform.ShowDialog() > $null
})
# Add all of the controls to the form.
$form.Controls.Add($label)
$form.Controls.Add($textBox)
$form.Controls.Add($groupBox)
$form.Controls.Add($groupBox1)
$form.Controls.Add($RButton)
$form.Controls.Add($HButton)
$form.Controls.Add($label1)
$form.Controls.Add($SR_label)
$form.Controls.Add($SR_textBox)
$form.Controls.Add($SN_label)
$form.Controls.Add($SN_textBox)
$form.Controls.Add($SD_label)
$form.Controls.Add($SD_textBox)
$form.Controls.Add($PB)
$form.Controls.Add($EmailButton)
# Initialize and show the form.
$form.Add_Shown({$form.Activate()})
$form.ShowDialog() > $null
}
Set-ExecutionPolicy unrestricted -Force
$date=get-Date -format "ddMMyy_HHmm"
$ComputerName=(Get-WmiObject -Class Win32_ComputerSystem -Property Name).Name
$Path=[System.Environment]::GetFolderPath([System.Environment+SpecialFolder]::Desktop)+"\Report\"
If ((Test-Path $Path) -eq $false)
{
New-Item $Path -type directory
}
New-Item -ErrorAction Ignore -ItemType directory -Path Report
$File=$Path + "SnapshotReport_$date.csv"
Snapshot</pre>
<!-- /wp:syntaxhighlighter/code -->
💡 Why this is a “Lazy” Win:
- Tab Isolation: You won’t accidentally delete snapshots while trying to create them.
- RunAsync Switch: I added
-RunAsyncto the deletion. This means the GUI won’t “freeze” while vCenter is doing the heavy lifting of disk consolidation. - Standardized Cleanup: By hardcoding
$Days = 2, you ensure that your team follows a consistent 48-hour retention policy.
Zerto vs. vSphere Replication: Which DR Strategy is for You? | Lazy Admin Blog

When it comes to Disaster Recovery (DR) in a VMware environment, there are two names that always come up: vSphere Replication (VR) and Zerto.
One is often “free” (included in most licenses), while the other is a premium enterprise powerhouse. But in 2026, with the shifts in Broadcom’s licensing and the rise of ransomware, the choice isn’t just about price—it’s about how much data you can afford to lose.
The Contenders
1. vSphere Replication (The Built-in Basic)
vSphere Replication is a hypervisor-based, asynchronous replication engine. It’s integrated directly into vCenter and captures changed blocks to send to a target site.
- Best For: Small to medium businesses with “relaxed” recovery goals.
- Cost: Included with vSphere Standard and vSphere Foundation subscriptions.
2. Zerto (The Gold Standard for CDP)
Zerto uses Continuous Data Protection (CDP). Instead of taking snapshots, it uses a lightweight agent on each host to intercept every write in real-time and stream it to the DR site.
- Best For: Mission-critical apps where losing 15 minutes of data is a catastrophe.
- Cost: Licensed per VM (Premium pricing).
Key Comparison: RPO and RTO
In the world of “Lazy Adminning,” we care most about RPO (Recovery Point Objective – how much data we lose) and RTO (Recovery Time Objective – how fast we get back up).
| Feature | vSphere Replication | Zerto (HPE) |
| Replication Method | Snapshot-based (Asynchronous) | Journal-based (CDP) |
| Best RPO | 5 to 15 Minutes | 5 to 10 Seconds |
| Point-in-Time Recovery | Limited (up to 24 instances) | Granular (Any second within 30 days) |
| Orchestration | Requires VMware Site Recovery Manager (SRM) | Built-in (One-click failover) |
| Snapshots | Uses VM Snapshots (can impact performance) | No Snapshots (Zero impact on IOPS) |
Why Choose vSphere Replication?
If you have a limited budget and your management is okay with losing 30 minutes of data, VR is the way to go.
- Pros: It’s already there. No extra software to install besides the appliance. It works well for low-change workloads.
- Cons: It relies on snapshots, which can cause “stun” on high-load SQL servers. Without adding SRM (Site Recovery Manager), failover is a manual, painful process of registering VMs and fixing IPs.
Why Choose Zerto?
If you are running a 24/7 shop or protecting against Ransomware, Zerto is king.
- Pros: The Journal is a time machine. If ransomware hits at 10:05:30 AM, you can failover to 10:05:25 AM. It also handles IP re-addressing and boot ordering natively.
- Cons: It’s an expensive add-on. It also requires a “Virtual Replication Appliance” (VRA) on every host in your cluster, which uses a bit of RAM and CPU.
The Verdict: Which one is “Lazy”?
- vSphere Replication is lazy at the start (easy to turn on), but high-effort during an actual disaster (lots of manual work).
- Zerto is a bit more work to set up but is the ultimate “Lazy Admin” tool during a disaster—you literally click one button, walk away, and grab a coffee while the entire data center boots itself at the DR site.
ZCP Study Guide: Zerto Certified Professional Exam Q&A | Lazy Admin Blog

Ready to become a Master of Disaster? If you are preparing for the Zerto Certified Professional (ZCP) exam, you know that understanding the nuances of Continuous Data Protection (CDP) is key.
Below is a quick-reference study guide based on the core competencies of the Zerto 4.5+ curriculum. We’ve highlighted the correct answers to help you review.
ZCP Practice Exam Questions
1) After performing a failover operation (Test, Live, Move) Zerto allows you to generate a report detailing the steps performed during the operation.
- True
- False
2) VPGs can only protect virtual machines running Mac OS X or Windows XP and newer.
- True
- False (Note: Zerto is generally OS-agnostic as it operates at the hypervisor replication level.)
3) To recover a single VPG after a corrupted database, which of these operations would be most effective?
- Journal file-level restore
- Offsite clone
- Live failover
- Backup restore
4) ZVR’s Journal is stored where?
- Production/source site
- Recovery/target site
- Both
- Neither
5) During a VPG sync, which of the following operations can be performed? (Select all that apply)
- Add a VM to the group
- Remove a VM from the group
- Change length of Journal history for the group
- Change hard limit of Journal size for the group
6) Offsite Backups for a VPG should be scheduled to run at least every four hours, but no more than every 12 hours.
- True
- False
7) How much memory can be allocated to a Virtual Replication Appliance (VRA)?
- 1 GB
- 3 GB
- Between 1-16 GB
- Between 2-8 GB
8) If both sites (target/recovery and source/production) are up, healthy, and accessible, which VPG-level operation is most appropriate?
- Live Failover
- Move/migration
- Offsite Clone
- JFLR
9) What basic method does ZVR use to protect data and applications?
- VM-level continuous replication
- Scheduled and on-demand snapshots
- Daily delta syncs
- Guest/agent-based replication
10) ZVR cannot function across different hypervisors, storage configurations, or host OS versions.
- True
- False (Note: Cross-replication between VMware and Hyper-V is a core Zerto strength.)
11) What must be true for a Move operation to be effective? (Select all that apply)
- Both source (or production) and target (recovery) sites are up and accessible
- Each VM in the VPG has an up-to-date Journal
- The very latest copy of the data is required
- One of the site’s hosts has either a new VRA installed or an upgraded VRA
12) A fully configured ZVM on each paired site—e.g. production and recovery—requires which of the following? (Select all that apply)
- Adding a site-specific license under Site Settings
- Creating matching VPGs on each site
- Installing VRAs on that site’s host(s)
13) Enabling auto-commit will always provide 30 minutes to validate the results of a failover before committing the changes.
- True
- False (Note: The timeout is configurable.)
14) ZVR has built-in support for scheduled bandwidth throttling that can work with or without other hardware/software also managing this.
- True
- False
15) What characterizes the kinds of VMs you should group together in the same VPG?
- Each are using the same datastore or volume for storage
- They need to maintain consistency with each other and all be failed over or recovered together
- All are running both the same OS and same hypervisor
- The journal is sized the same on each VM
16) Adding a VM to an existing VPG means… (Select all that apply)
- The entire VPG will be re-synchronized to ensure group consistency
- The VPG protection will need to be paused before adding the additional VM
- A checkpoint will be automatically inserted in the Journal prior to adding the VM
- A Live Failover cannot be executed until the updated VPG is fully synchronized
17) What is the Journal?
- Audit trail to track which operations were performed and when
- Series of checkpoints tracking block-level changes within VMs
- Detailed list of every snapshot, whether automatic or manually generated snapshots
- Compliance record of each VPG’s replication status at any given checkpoint
18) The ZVR installer includes which of the following components? (Select all that apply)
- Local copies of the ZVR documentation specific to your hypervisor
- One license key for each site you’ll use with Zerto
- Microsoft .NET Framework in case the machine does not already have it installed
- VRA template for a custom-designed Zerto VM
- A Virtual Backup Appliance (VBA) for managing backups
19) If you needed to test the failover of an entire virtualized datacenter, what best practices should be followed? (Select all that apply)
- Perform the test during off hours or on the weekend
- Clone the VPGs you want to test prior to starting the failover test
- Use an isolated/fenced network for testing
- Always stop the test from within ZVM and not your hypervisor’s management console(s)
- Provision a sandbox where ZVR can deploy the test VMs
20) What is a Virtual Replication Appliance (VRA)?
- Lightweight agent installed on each VM in a protection group
- Snapshot engine that powers the ZVR Journal
- Custom Linux VM performing continuous replication
- A hypervisor plugin/add-on to manage cross-hypervisor replication
21) ZVR 4.5 allows for Journal Compression to increase storage capacity for journal history.
- True
- False
22) If the hypervisor service/admin account provided during installation is incorrect, ZVR will still proceed with the installation and ask for re-validation after installation is complete.
- True
- False
23) When configuring a Failover Test network, what is Zerto’s recommended best practice?
- Test and production network should be the same to ensure consistency
- Test network should be isolated/fenced
- The ZVM should be on a test network
- Pause replication on production network when using a test network during a test
24) What operating system is running on the VRA virtual machine?
- Ubuntu
- Debian
- Red Hat Enterprise Linux
- Windows Server 2012
25) What VPG configuration option would give you the ability to stagger when and how your protected VMs start?
- Bandwidth Throttling
- Re-IP
- Pre/Post Operation Scripting
- Boot Order Groups
Level Up: Becoming a Zerto Certified Professional (ZCP) | Lazy Admin Blog
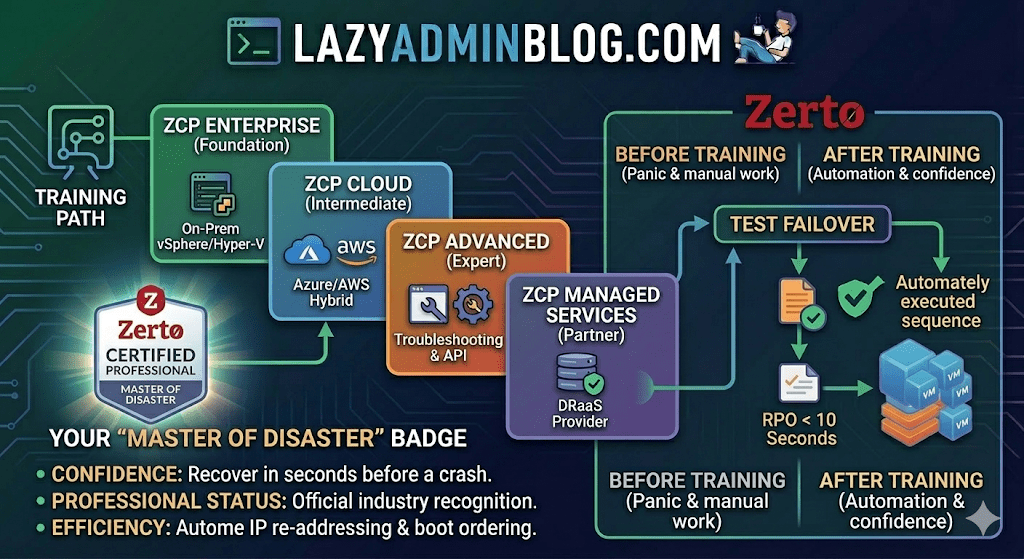
In the world of Disaster Recovery, there are two types of admins: those who panic during an outage, and those who have “Master of Disaster” status.
If you’re looking to join the elite ranks of the latter, it’s time to talk about Zerto Certified Professional (ZCP) training. While the original ZVR 4.5 training was a game-changer for its time, Zerto’s training ecosystem has evolved significantly since then to keep pace with modern cloud and ransomware threats.
What is ZCP Training?
Zerto Certified Professional (ZCP) is the official technical certification program designed for customers and partners. It moves you beyond the basics of “click and replicate” into the deep engineering of Continuous Data Protection (CDP).
The current curriculum has shifted from just “Basic” to a more modular, role-based approach available through the myZerto University platform.
Key Learning Pillars:
- Architecture & Installation: Setting up the Zerto Virtual Manager (ZVM) and Virtual Replication Appliances (VRAs).
- VPG Management: Creating Virtual Protection Groups (VPGs) to keep multi-VM applications consistent.
- The “Time Machine” (Journal): Master file-level restores and point-in-time recovery to defeat ransomware.
- The Big Red Button: Coordinating Test Failovers, Live Failovers, and Move operations without breaking a sweat.
Is it still “Basic”?
Zerto has streamlined its certifications into several paths to match your specific environment:
| Certification | Level | Focus Area |
| ZCP Enterprise | Foundation | Core vSphere/Hyper-V to On-Prem replication. |
| ZCP Azure/AWS | Intermediate | Hybrid Cloud DR and migration to public clouds. |
| ZCP Advanced | Expert | Complex troubleshooting, multi-site, and API automation. |
| ZCP Managed Services | Partner | Specifically for DRaaS (Disaster Recovery as a Service) providers. |
Why Bother Getting Certified?
- Confidence: Knowing exactly how the journal works means you can recover data from seconds before a crash.
- Professional Status: It officially recognizes you as a “Master of Disaster” within the community.
- Efficiency: You’ll learn the “Lazy Admin” way to automate IP re-addressing and boot ordering, so you don’t have to do it manually during a crisis.
How to Get Started
- Access: Head over to the myZerto Portal. (Note: You still need to be a customer or partner to access full technical training).
- Time Investment: Most foundational courses take between 90 minutes and 3 hours of self-paced e-learning.
- The Exam: You’ll typically need a 75% or higher to pass. The exams are online, unproctored, and refreshingly focused on real-world scenarios rather than trivia.
Lazy Admin Tip: Don’t just watch the videos. If you have a lab environment, try to break a VPG and see how the ZVM alerts you. Real learning happens when the lights go red!
Forgot Your ESXi Root Password? Reset It Without Reinstalling (vCenter Hack) | Lazy Admin Blog

We’ve all been there. You go to log into the DCUI or SSH into a host only to find the root password doesn’t work, and nobody documented the change.
According to VMware’s official stance, the only “supported” way to recover is a complete wipe and reinstall. But if your host is still managed by vCenter and you have Enterprise Plus licensing, there is a “lazy” (and highly effective) way out using Host Profiles.
How it works
When a host is added to vCenter, a special user called vpxa is created with full root privileges. We can use this existing “backdoor” to push a new configuration to the host, effectively overwriting the lost root password.
Step-by-Step Recovery
1. Extract the Profile
Right-click the “locked” host in the vSphere Web Client. Navigate to All vCenter Actions > Host Profiles > Extract Host Profile. Follow the wizard to create a template of that specific host’s configuration.
2. Edit the Security Settings
Go to Home > Host Profiles (under Management). Right-click your new profile and select Edit.
- Expand Security and Services.
- Expand Security Settings.
- Click on Security Configuration.
- In the dropdown, select: “Configure a fixed administrator password”.
- Enter and confirm your new root password.
3. Attach and Remediate
- Go back to Hosts and Clusters, right-click the host, and select Host Profiles > Attach Host Profile. Select the one you just edited.
- Maintenance Mode: You must put the host into Maintenance Mode.
- Remediate: Right-click the host again, select Host Profiles > Remediate. If you skip Maintenance Mode, vSphere will block the operation.
4. Finish
Once the remediation task completes, the host will reboot. Your new root password is now active!
Important Limitations
- Licensing: This requires Enterprise Plus. Standard or Essentials kits do not include Host Profiles.
- Connectivity: The host must be currently “Connected” in vCenter. If the management agent has crashed or the host is “Not Responding,” this method will not work.
The “Lazy Admin” Verdict
Reinstalling an ESXi host means reconfiguring networking, storage, and scratch partitions. Using a Host Profile takes about 10 minutes and keeps your uptime (and sanity) intact.
The Clean Exit: How to Safely Remove Storage Devices from ESXi | Lazy Admin Blog

In the world of storage, “unpresenting” a LUN is more than just a right-click. If you don’t follow the proper decommissioning workflow, ESXi will keep trying to talk to a ghost device, leading to host instability and long boot times.
Follow this definitive checklist and procedure to ensure your environment stays clean and APD-free.
The “Safe-to-Remove” Checklist
Before you even touch the unmount button, verify these 7 critical points:
- Evacuate Data: Move or unregister all VMs, snapshots, templates, and ISO images from the datastore.
- HA Heartbeats: Ensure the datastore is NOT being used for vSphere HA heartbeats.
- No Clusters: Remove the datastore from any Datastore Clusters or Storage DRS management.
- Coredump: Confirm the LUN isn’t configured as a diagnostic coredump partition.
- SIOC: Disable Storage I/O Control (SIOC) for the datastore.
- RDMs: If the LUN is an Raw Device Mapping, remove the RDM from the VM settings (select “Delete from disk” to kill the mapping file).
- Scratch Location: Ensure the host isn’t using this LUN for its persistent scratch partition.
Pro Tip: Check Scratch Location via PowerCLI
Use this script to verify your scratch config across a cluster:
$cluster = "YourClusterName"foreach ($esx in Get-Cluster $cluster | Get-VMHost) { Get-VMHostAdvancedConfiguration -VMHost $esx -Name "ScratchConfig.ConfiguredScratchLocation"}
Step 1: Identify your NAA ID
You need the unique Network Address Authority (NAA) ID to ensure you are pulling the right plug.
- Via GUI: Check the Properties window of the datastore.
- Via CLI: Run
esxcli storage vmfs extent list
Step 2: The Unmount & Detach Workflow
1. Unmount the File System
In the Configuration tab > Storage, right-click the datastore and select Unmount. If you are doing this for multiple hosts, use the Datastores view (Ctrl+Shift+D) to unmount from the entire cluster at once.
2. Detach the Device (The Most Important Step)
Unmounting removes the “logical” access, but Detaching tells the kernel to stop looking for the “physical” device.
- Switch to the Devices view.
- Right-click the NAA ID and select Detach.
- The state should now show as Unmounted.
Note: Detaching is a per-host operation. You must perform this on every host that has visibility to the LUN to avoid APD states.
Step 3: Cleanup the SAN & Host
Once the state is “Unmounted” across all hosts, you can safely unmap/unpresent the LUN from your SAN array.
Permanent Decommissioning
To prevent “ghost” entries from appearing in your detached list, run these commands on the host:
- List detached devices:
esxcli storage core device detached list - Remove the configuration permanently:
esxcli storage core device detached remove -d <NAA_ID>
The Master List: VMware vCenter Release & Build Number History (Updated 2026) | Lazy Admin Blog

Version tracking is the backbone of lifecycle management. Whether you are patching against the latest security vulnerability or verifying compatibility for a backup agent, you need the exact build number.
Below is the comprehensive history of vCenter Server, from the cutting-edge vSphere 9.0 down to the legacy VirtualCenter 2.5.
vCenter Server 9.0 Build Numbers (Latest)
vSphere 9.0 represents the latest shift toward AI-integrated infrastructure and cloud-native operations.
| Name | Version | Release Date | Build Number |
| vCenter Server 9.0.2.0 | 9.0.2 | 01/20/2026 | 25148086 |
| vCenter Server 9.0.1.0 | 9.0.1 | 09/29/2025 | 24957454 |
| vCenter Server 9.0 GA | 9.0.0 | 06/17/2025 | 24755230 |
vCenter Server 8.0 Build Numbers
The 8.0 Update 3 branch is the current stable “workhorse” for most enterprise environments.
| Name | Version | Release Date | Build Number |
| vCenter Server 8.0 Update 3i | 8.0.3.00800 | 02/24/2026 | 25197330 |
| vCenter Server 8.0 Update 3h | 8.0.3.00700 | 12/15/2025 | 25092719 |
| vCenter Server 8.0 Update 3g | 8.0.3.00600 | 07/29/2025 | 24853646 |
| vCenter Server 8.0 Update 3e | 8.0.3.00500 | 04/11/2025 | 24674346 |
| vCenter Server 8.0 Update 3 | 8.0.3.00000 | 06/25/2024 | 24022515 |
| vCenter Server 8.0 Update 2 | 8.0.2.00000 | 09/21/2023 | 22385739 |
| vCenter Server 8.0 Update 1 | 8.0.1.00000 | 04/18/2023 | 21560480 |
| vCenter Server 8.0 GA | 8.0.0.10000 | 10/11/2022 | 20519528 |
vCenter Server 7.0 Build Numbers
Note: vCenter for Windows was officially removed starting with version 7.0.
| Name | Version | Release Date | Build Number |
| vCenter Server 7.0 Update 3w | 7.0.3.02500 | 09/29/2025 | 24927011 |
| vCenter Server 7.0 Update 3l | 7.0.3.01400 | 03/30/2023 | 21477706 |
| vCenter Server 7.0 Update 2 | 7.0.2.00000 | 03/09/2021 | 17694817 |
| vCenter Server 7.0 GA | 7.0.0.10100 | 04/02/2020 | 15952498 |
Legacy vCenter Server Build Numbers (vSphere 4.0 – 6.7)
| Name | Version | Release Date | Build Number |
| vCenter Server 6.7 Update 3w | 6.7.0.58000 | 10/28/2024 | 24337536 |
| vCenter Server 6.5 Update 3w | 6.5.0.43000 | 07/04/2024 | 24045034 |
| vCenter Server 6.0 Update 1 | 6.0 U1 | 09/10/2015 | 3018524 |
| vCenter Server 5.5 Update 3 | 5.5 U3 | 09/16/2015 | 3000241 |
| vCenter Server 5.1 Update 3 | 5.1 U3 | 12/04/2014 | 2306353 |
| vCenter Server 5.0 GA | 5.0 GA | 08/24/2011 | 456005 |
| vCenter Server 4.1 GA | 4.1 GA | 07/13/2010 | 259021 |
| vCenter Server 4.0 GA | 4.0 GA | 05/21/2009 | 162856 |
| VirtualCenter 2.5.0 GA | 2.5.0 | 12/10/2007 | 64192 |
Quick Tips for the Lazy Admin
- Check via VAMI: For 6.7 and newer, go to
https://<vcenter-ip>:5480. The version and build are right on the login screen. - Compatibility: Before upgrading vCenter, check the VMware Interoperability Matrix. Just because vCenter 9.0 is out doesn’t mean your older ESXi 6.7 hosts can talk to it!
- VCSA Migration: If you are still on version 6.5 or 6.7, your next step is a migration to the Appliance (VCSA). There is no “in-place” upgrade for Windows-based vCenter to 7.0+.
#VMware #vSphere9 #vCenter #SysAdmin #Virtualization #Datacenter #LazyAdmin #BuildNumbers #ITOps #PatchManagement
SRM Plugin Down? How to Generate Diagnostic Logs via the Command Line | Lazy Admin Blog

In a high-pressure recovery situation, the last thing you want to see is the “SRM Connection Failed” error in your vSphere Client. If you can’t access the SRM interface to click “Gather Logs,” you have to go straight to the source.
Site Recovery Manager includes a standalone support script that packages all necessary diagnostics directly from the Windows Server filesystem, even if the SRM service itself is struggling.
Step 1: Locate the Support Script
Log into the Windows Server where SRM is installed and navigate to the \bin\ directory. The path varies slightly depending on your version and OS architecture:
- 64-bit Windows (Standard):
C:\Program Files\VMware\VMware vCenter Site Recovery Manager\bin\ - 32-bit Windows (Legacy):
C:\Program Files (32 bit)\VMware\VMware vCenter Site Recovery Manager\bin\ - SRM 1.0 (Vintage):
C:\Program Files\VMware\VMware Site Recovery Manager\bin\
Step 2: Generate the Bundle
- Look for the file named
srm-support.wsf. - Double-click the file to execute it.
- Wait a few moments. A compressed log bundle will appear on the Desktop of the current user, named in this format:
srm-plugin-support-MM-DD-YYYY-hh-mm.zip.
Step 3: Label Your Logs (The “Pro” Tip)
VMware Support will often need logs from both the Protected and Recovery sites. Because the log bundles look identical, VMware highly recommends renaming the files before uploading them to the FTP portal:
protected-srm-support-MM-DD-YYYY.ziprecovery-srm-support-MM-DD-YYYY.zip
Don’t Forget the SRA Logs!
If your issue involves storage replication, VMware will also need the Storage Replication Adapter (SRA) logs. These are usually tucked away in vendor-specific folders:
...\VMware vCenter Site Recovery Manager\scripts\SAN\<SRA Vendor Name>\log\C:\Program Files\<SRA Vendor Name>\
Manual Configuration Check
If you need to verify your extension ID or database connection strings manually, you can find the core XML configuration files in the \config\ directory:
extension.xmlvmware-dr.xml
vSphere Ports & Connections: The Infrastructure Roadmap | Lazy Admin Blog

In a locked-down enterprise environment, the “Any-to-Any” firewall rule is a myth. To manage ESXi effectively, you need to poke specific holes in your hardware and software firewalls.
The Core Management Ports
These are the “must-haves” for basic connectivity between vCenter, the vSphere Client, and the Host.
| Port | Protocol | Source | Destination | Purpose |
| 443 | TCP | Management Workstation | vCenter / ESXi | vSphere Client / SDK: The primary port for the Web Client and API access. |
| 902 | TCP/UDP | vCenter Server | ESXi Host | vCenter Agent (vpxa): vCenter uses this to send data to the host and receive heartbeats. |
| 902 | TCP | Management Workstation | ESXi Host | VM Console: Required to open the “Remote Console” (MKS) to a virtual machine. |
| 80 | TCP | vCenter / Workstation | ESXi Host | HTTP: Used for redirecting to 443 and for some legacy file downloads. |
Advanced Feature Ports
If you are using specific vSphere features like vMotion, HA, or specialized storage, you need these additional ports open:
1. vMotion (Live Migration)
- 8000 (TCP): Required for vMotion traffic.
- 2049 (TCP/UDP): If using NFS storage for the virtual disks.
2. vSphere High Availability (HA)
- 8182 (TCP/UDP): Used by the Fault Domain Manager (FDM) agent for inter-host communication and election of the master host.
3. Provisioning & Deployment
- 69 (UDP): TFTP, used for PXE booting ESXi for Auto Deploy.
- 4012 (TCP): Used by the Auto Deploy service.
4. Troubleshooting & Monitoring
- 22 (TCP): SSH access to the ESXi Shell.
- 161 / 162 (UDP): SNMP polling and traps for hardware monitoring.
Troubleshooting “Host Disconnected”
If your host shows as “Not Responding” in vCenter, check these three things in order:
- Ping: Can the vCenter server ping the ESXi management IP?
- Port 902: From the vCenter server, try to telnet to the host on port 902 (
telnet <host-ip> 902). If it fails, the heartbeat can’t get through. - DNS: VMware is extremely sensitive to DNS. Ensure forward and reverse lookups work for both the vCenter and the Host.
Lazy Admin Tip 💡
Don’t memorize every port! Use the VMware Ports and Protocols Tool (the official online matrix). It allows you to select your source and destination products and generates a custom firewall rule list for you.
A high resolution pdf can be downloaded here Connections and Ports in ESX and ESXi
#VMware #vSphere #Networking #SysAdmin #Firewall #DataCenter #ESXi #ITOps #LazyAdmin #Connectivity