
vcenter
Automation: Bulk Create and Delete VM Snapshots Across Linked vCenters | Lazy Admin Blog

In a large environment, taking snapshots before a major patch or application update is a standard safety net. But if you have servers spread across multiple vCenters in Linked Mode (e.g., Datacenter1 and Datacenter2), clicking through the vSphere Client is a waste of time.
Today, I’m sharing a “Lazy Admin” script that allows you to bulk create, check, and remove snapshots using a simple CSV list.
Prerequisites
- VMware PowerCLI: Ensure the PowerCLI module is installed on the machine running the script.
- CSV Setup: Create a file named
snapshot_servers.csvinC:\Temp\VMSnapshots\.
The CSV should look like this: | Host | Location | | :— | :— | | Server01 | Datacenter1 | | Server02 | Datacenter2 |
Part 1: Creating Snapshots
- Open PowerShell ISE with vCenter Administrator credentials.
- Load the functions by running the full script (provided below).
- Run the following command:
Create-VMSnapshots -SS_CSV "C:\Temp\VMSnapshots\snapshot_servers.csv" -SS_Name "Pre-Patching" -SS_Description "Requested by App Team"
The script will iterate through your CSV and create snapshots sequentially. You can monitor the progress in the vSphere Tasks console.
Part 2: Deleting Snapshots
Once your changes are verified, don’t let those snapshots linger and bloat your datastores! To remove them:
- Use the same
snapshot_servers.csvlist. - Run the following command:
Remove-VMSnapshots -SS_CSV "C:\Temp\VMSnapshots\snapshot_servers.csv"
Note: This is a sequential script; it will wait for one snapshot removal to finish before moving to the next to avoid pinning your storage I/O.
The Script: VMSnapshots.ps1
Save this code to C:\Temp\VMSnapshots\VMSnapshots.ps1.
function Create-VMSnapshots { param ( [string]$SS_CSV = $(Read-Host "Enter path to CSV"), [string]$SS_Name = $(Read-Host "Enter name for snapshots"), [string]$SS_Description = $(Read-Host "Enter description for snapshots") ) # Import VMware PowerCLI Module If ( !(Get-Module -Name VMware.VimAutomation.Core -ErrorAction SilentlyContinue) ) { import-module VMware.VimAutomation.Core } $Servers = Import-CSV $SS_CSV $WLM_vCenter = Connect-VIServer vCenter1 -WarningAction SilentlyContinue $EDN_vCenter = Connect-VIServer vCenter2 -WarningAction SilentlyContinue ForEach($Server in $Servers){ If($Server.Location -eq 'Datacenter1'){ New-Snapshot -VM $Server.Host -Name $SS_Name -Description $SS_Description -Quiesce -Server $WLM_vCenter -WarningAction SilentlyContinue } ElseIf($Server.Location -eq 'Datacenter2'){ New-Snapshot -VM $Server.Host -Name $SS_Name -Description $SS_Description -Quiesce -Server $EDN_vCenter -WarningAction SilentlyContinue } } }function Check-VMSnapshots { param ( [string]$SS_CSV = $(Read-Host "Enter path to CSV"), [string]$SS_Name = $(Read-Host "Enter snapshot name") ) # Import VMware PowerCLI Module If ( !(Get-Module -Name VMware.VimAutomation.Core -ErrorAction SilentlyContinue) ) { import-module VMware.VimAutomation.Core } $Servers = Import-CSV $SS_CSV $WLM_vCenter = Connect-VIServer vCenter1 -WarningAction SilentlyContinue $EDN_vCenter = Connect-VIServer vCenter2 -WarningAction SilentlyContinue ForEach($Server in $Servers){ If($Server.Location -eq 'Datacenter1'){ Get-Snapshot -VM $Server.Host -Name $SS_Name -Server $WLM_vCenter | Select VM, Name, @{ n="SpaceUsedGB"; e={[math]::round( $_.SizeGB )}} -WarningAction SilentlyContinue } ElseIf($Server.Location -eq 'Datacenter2'){ Get-Snapshot -VM $Server.Host -Name $SS_Name -Server $EDN_vCenter | Select VM, Name, @{ n="SpaceUsedGB"; e={[math]::round( $_.SizeGB )}} -WarningAction SilentlyContinue } } } function Remove-VMSnapshots { param ( [string]$SS_CSV = $(Read-Host "Enter path to CSV") ) # Import VMware PowerCLI Module If ( !(Get-Module -Name VMware.VimAutomation.Core -ErrorAction SilentlyContinue) ) { import-module VMware.VimAutomation.Core } $Servers = Import-CSV $SS_CSV $WLM_vCenter = Connect-VIServer vCenter1 -WarningAction SilentlyContinue $EDN_vCenter = Connect-VIServer vCenter2 -WarningAction SilentlyContinue ForEach($Server in $Servers){ If($Server.Location -eq 'Datacenter1'){ Get-Snapshot $Server.Host -Server $WLM_vCenter | Remove-Snapshot -Confirm:$false -WarningAction SilentlyContinue } ElseIf($Server.Location -eq 'Datacenter2'){ Get-Snapshot $Server.Host -Server $EDN_vCenter | Remove-Snapshot -Confirm:$false -WarningAction SilentlyContinue } } }
EVC Mode & CPU Compatibility FAQ | Lazy Admin Blog

You’ve just unboxed a shiny new host with the latest Intel or AMD processor, but your current cluster is running hardware from three years ago. You try to vMotion a VM, and vSphere gives you the dreaded “CPU Incompatibility” error.
Enter Enhanced vMotion Compatibility (EVC). Here’s everything you need to know to get your mixed-hardware cluster working without the headache.
What exactly is EVC?
Think of EVC as a “lowest common denominator” filter for your CPUs. It masks the advanced features of newer processors so that every host in the cluster appears to have the exact same instruction set. This allows VMs to live-migrate between old and new hardware because the “view” of the CPU never changes.
Quick FAQ
Q: Can I mix Intel and AMD in the same EVC cluster? A: No. EVC only works within a single vendor family. You can mix different generations of Intel, or different generations of AMD, but you cannot vMotion between the two brands.
Q: Will EVC slow down my new servers? A: Technically, yes—but rarely in a way you’ll notice. It hides new instructions (like specialized encryption or AI math sets), but the raw clock speed and core count of your new CPUs are still fully utilized. Most general-purpose VMs don’t use the high-end instructions being masked.
Q: Do I need to power off VMs to enable EVC? A: It depends:
- Enabling on an empty cluster: No downtime.
- Enabling on a cluster where VMs are already running on the oldest host: Usually no downtime.
- Enabling on a cluster where VMs are running on newer hosts: You must power off those VMs so they can “re-boot” with the masked CPU instructions.
Q: What is “Per-VM EVC”? A: Introduced in vSphere 6.7, this allows you to set the EVC mode on the VM itself rather than the whole cluster. This is a lifesaver for migrating VMs across different vCenters or into the Cloud (like AWS/Azure).
How to Find Your Correct EVC Mode
Don’t guess. Use the official tool:
- Go to the VMware Compatibility Guide (CPU/EVC Matrix).
- Select your ESXi version.
- Select the CPU models of your oldest and newest hosts.
- The tool will tell you the highest supported “Baseline” you can use.
Step-by-Step: Enabling EVC on an Existing Cluster
- Select your Cluster in vCenter.
- Go to Configure > VMware EVC.
- Click Edit.
- Select Enable EVC for Intel/AMD hosts.
- Choose the Baseline that matches your oldest host.
- Validation: vCenter will check if any running VMs are currently using features above that baseline. If they are, you’ll need to shut them down before you can save the settings.
Summary Table: EVC Baselines
| If your oldest host is… | Use this EVC Mode |
| Intel Ice Lake | Intel “Ice Lake” Generation |
| Intel Cascade Lake | Intel “Cascade Lake” Generation |
| AMD EPYC Rome | AMD EPYC “Rome” Generation |
How to Force Cancel a Hung Task in vCenter or ESXi | Lazy Admin Blog
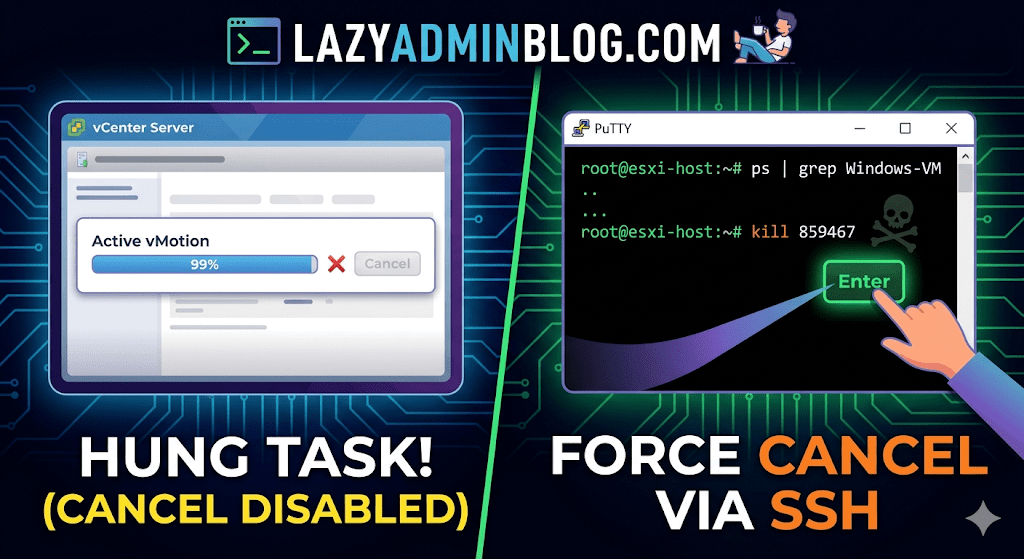
We’ve all been there: a vMotion hits 99% and just… stays there. Or a backup job finishes on the proxy side, but vCenter still thinks the VM is “busy.” Usually, the Cancel button is grayed out, leaving you stuck in management limbo.
When the GUI fails you, it’s time to hop into the CLI. Here is how to manually kill a hung task by targeting the VM’s parent process.
Step 1: Verify the Task
Before pulling the trigger, confirm the task is actually stuck and not just slow. Check the Monitor > Tasks and Events tab for the specific VM. If the progress bar hasn’t budged in an hour and the “Cancel” option is disabled, proceed to the host.
Step 2: Enable and Connect via SSH
To kill a process, you need to be on the specific ESXi host where the VM is currently registered.
- Enable SSH: Go to the ESXi host in vSphere > Configure > System > Services > Start SSH.
- Connect: Open your terminal (Putty, CMD, or Terminal) and log in as
root.
Step 3: Locate the Parent Process ID (PID)
We need to find the specific process tied to your VM. Use the ps command combined with grep to filter for your VM’s name.
Run the following command:
ps -v | grep "Your_VM_Name"
(Note: Using the -v flag in ESXi provides a more detailed view of the world ID and parent processes.)
Look for the line representing the VM’s main process. You are looking for the Leader ID or the first ID listed in the row.
Step 4: Kill the Process
Once you have identified the ID (e.g., 859467), send the kill signal. Start with a standard terminate signal, which allows the process to clean up after itself.
Run the command:
kill 859467
Lazy Admin Tip: If the process is extremely stubborn and won’t die, you can use
kill -9 859467to force an immediate termination. Use this as a last resort!
Step 5: Verify in vSphere
Give vCenter a minute to catch up. The hung task should now disappear or show as “Canceled” in the Tasks and Events console. Your VM should return to an “Idle” state, allowing you to power it on, move it, or restart your backup.
vSphere IDs: The Ultimate Quick Reference Guide | Lazy Admin Blog

Ever feel like you’re drowning in a sea of GUIDs and MoRefs? When you’re scripting or troubleshooting, using the wrong ID is the fastest way to break a backup job or target the wrong server.
Here is the “Lazy Admin” breakdown of the most common vSphere identifiers and how to grab them with PowerCLI.
1. vCenter Instance UUID (serverGuid)
This is the “SSN” of your vCenter server. It’s generated at install time and stays durable for that instance.
- Why it matters: In Linked Mode or cross-vCenter environments, this identifies which vCenter owns an object.
- PowerCLI:PowerShell
$vcenter = Connect-viserver vcsa-01a.corp.local $vcenter.InstanceUuid
2. ESXi Host UUID
Unlike other IDs, this isn’t generated by VMware. It’s pulled from the hardware’s SMBIOS.
- Why it matters: It’s unique to the physical motherboard/vendor.
- PowerCLI:PowerShell
(Get-VMHost | Select -First 1).ExtensionData.hardware.systeminfo.uuid
3. VC-VM Instance UUID (The “Management” ID)
Found in the .vmx file as vc.uuid. This is what vCenter uses to track VMs.
- The “Magic”: vCenter actively scans for duplicates of this ID and will “patch” (change) it automatically if it finds a conflict within its own inventory.
- PowerCLI:PowerShell
(Get-VM | Select -First 1).extensiondata.config.InstanceUUID
4. VM SMBIOS UUID (The “Guest” ID)
Found as uuid.bios in the .vmx. This is what the Guest OS (Windows/Linux) sees as the hardware serial number.
- The “Magic”: vCenter tries not to change this because many applications use it for licensing. If you move/copy a VM, vCenter will ask you what to do to prevent duplicates.
- PowerCLI:PowerShell
(Get-VM | Select -First 1).extensiondata.Config.UUID
5. VM Location ID
Stored as uuid.location. This is a hash of the VM’s configuration file path and the ESXi host UUID.
- The “I Moved It” Prompt: When this hash doesn’t match the current environment, vSphere triggers that famous “Did you move it or copy it?” popup.
- PowerCLI:PowerShell
(Get-VM | Select -First 1).extensiondata.config.LocationId
6. VM MoRef (Managed Object Reference)
The MoRef is the “Short ID” (like vm-43) used by the API and the vCenter database.
- Why it matters: This is the most important ID for database associations (stats, events, tasks). It is not unique across different vCenters.
- PowerCLI:PowerShell
(Get-VM | Select -First 1).ExtensionData.Moref.Value
Quick ID Reference Table
| ID Name | Scope | Persistence | Best Use Case |
| MoRef | Single vCenter | Changes if re-inventoried | API calls & DB tracking |
| Instance UUID | Single vCenter | High (Patched by VC) | Unique VM tracking |
| SMBIOS UUID | Global/Guest OS | Very High | Guest Software Licensing |
| Host UUID | Physical Hardware | Permanent | Hardware Asset Tracking |
Forgot Your ESXi Root Password? Reset It Without Reinstalling (vCenter Hack) | Lazy Admin Blog

We’ve all been there. You go to log into the DCUI or SSH into a host only to find the root password doesn’t work, and nobody documented the change.
According to VMware’s official stance, the only “supported” way to recover is a complete wipe and reinstall. But if your host is still managed by vCenter and you have Enterprise Plus licensing, there is a “lazy” (and highly effective) way out using Host Profiles.
How it works
When a host is added to vCenter, a special user called vpxa is created with full root privileges. We can use this existing “backdoor” to push a new configuration to the host, effectively overwriting the lost root password.
Step-by-Step Recovery
1. Extract the Profile
Right-click the “locked” host in the vSphere Web Client. Navigate to All vCenter Actions > Host Profiles > Extract Host Profile. Follow the wizard to create a template of that specific host’s configuration.
2. Edit the Security Settings
Go to Home > Host Profiles (under Management). Right-click your new profile and select Edit.
- Expand Security and Services.
- Expand Security Settings.
- Click on Security Configuration.
- In the dropdown, select: “Configure a fixed administrator password”.
- Enter and confirm your new root password.
3. Attach and Remediate
- Go back to Hosts and Clusters, right-click the host, and select Host Profiles > Attach Host Profile. Select the one you just edited.
- Maintenance Mode: You must put the host into Maintenance Mode.
- Remediate: Right-click the host again, select Host Profiles > Remediate. If you skip Maintenance Mode, vSphere will block the operation.
4. Finish
Once the remediation task completes, the host will reboot. Your new root password is now active!
Important Limitations
- Licensing: This requires Enterprise Plus. Standard or Essentials kits do not include Host Profiles.
- Connectivity: The host must be currently “Connected” in vCenter. If the management agent has crashed or the host is “Not Responding,” this method will not work.
The “Lazy Admin” Verdict
Reinstalling an ESXi host means reconfiguring networking, storage, and scratch partitions. Using a Host Profile takes about 10 minutes and keeps your uptime (and sanity) intact.
The Master List: VMware vCenter Release & Build Number History (Updated 2026) | Lazy Admin Blog

Version tracking is the backbone of lifecycle management. Whether you are patching against the latest security vulnerability or verifying compatibility for a backup agent, you need the exact build number.
Below is the comprehensive history of vCenter Server, from the cutting-edge vSphere 9.0 down to the legacy VirtualCenter 2.5.
vCenter Server 9.0 Build Numbers (Latest)
vSphere 9.0 represents the latest shift toward AI-integrated infrastructure and cloud-native operations.
| Name | Version | Release Date | Build Number |
| vCenter Server 9.0.2.0 | 9.0.2 | 01/20/2026 | 25148086 |
| vCenter Server 9.0.1.0 | 9.0.1 | 09/29/2025 | 24957454 |
| vCenter Server 9.0 GA | 9.0.0 | 06/17/2025 | 24755230 |
vCenter Server 8.0 Build Numbers
The 8.0 Update 3 branch is the current stable “workhorse” for most enterprise environments.
| Name | Version | Release Date | Build Number |
| vCenter Server 8.0 Update 3i | 8.0.3.00800 | 02/24/2026 | 25197330 |
| vCenter Server 8.0 Update 3h | 8.0.3.00700 | 12/15/2025 | 25092719 |
| vCenter Server 8.0 Update 3g | 8.0.3.00600 | 07/29/2025 | 24853646 |
| vCenter Server 8.0 Update 3e | 8.0.3.00500 | 04/11/2025 | 24674346 |
| vCenter Server 8.0 Update 3 | 8.0.3.00000 | 06/25/2024 | 24022515 |
| vCenter Server 8.0 Update 2 | 8.0.2.00000 | 09/21/2023 | 22385739 |
| vCenter Server 8.0 Update 1 | 8.0.1.00000 | 04/18/2023 | 21560480 |
| vCenter Server 8.0 GA | 8.0.0.10000 | 10/11/2022 | 20519528 |
vCenter Server 7.0 Build Numbers
Note: vCenter for Windows was officially removed starting with version 7.0.
| Name | Version | Release Date | Build Number |
| vCenter Server 7.0 Update 3w | 7.0.3.02500 | 09/29/2025 | 24927011 |
| vCenter Server 7.0 Update 3l | 7.0.3.01400 | 03/30/2023 | 21477706 |
| vCenter Server 7.0 Update 2 | 7.0.2.00000 | 03/09/2021 | 17694817 |
| vCenter Server 7.0 GA | 7.0.0.10100 | 04/02/2020 | 15952498 |
Legacy vCenter Server Build Numbers (vSphere 4.0 – 6.7)
| Name | Version | Release Date | Build Number |
| vCenter Server 6.7 Update 3w | 6.7.0.58000 | 10/28/2024 | 24337536 |
| vCenter Server 6.5 Update 3w | 6.5.0.43000 | 07/04/2024 | 24045034 |
| vCenter Server 6.0 Update 1 | 6.0 U1 | 09/10/2015 | 3018524 |
| vCenter Server 5.5 Update 3 | 5.5 U3 | 09/16/2015 | 3000241 |
| vCenter Server 5.1 Update 3 | 5.1 U3 | 12/04/2014 | 2306353 |
| vCenter Server 5.0 GA | 5.0 GA | 08/24/2011 | 456005 |
| vCenter Server 4.1 GA | 4.1 GA | 07/13/2010 | 259021 |
| vCenter Server 4.0 GA | 4.0 GA | 05/21/2009 | 162856 |
| VirtualCenter 2.5.0 GA | 2.5.0 | 12/10/2007 | 64192 |
Quick Tips for the Lazy Admin
- Check via VAMI: For 6.7 and newer, go to
https://<vcenter-ip>:5480. The version and build are right on the login screen. - Compatibility: Before upgrading vCenter, check the VMware Interoperability Matrix. Just because vCenter 9.0 is out doesn’t mean your older ESXi 6.7 hosts can talk to it!
- VCSA Migration: If you are still on version 6.5 or 6.7, your next step is a migration to the Appliance (VCSA). There is no “in-place” upgrade for Windows-based vCenter to 7.0+.
#VMware #vSphere9 #vCenter #SysAdmin #Virtualization #Datacenter #LazyAdmin #BuildNumbers #ITOps #PatchManagement
vSphere Ports & Connections: The Infrastructure Roadmap | Lazy Admin Blog

In a locked-down enterprise environment, the “Any-to-Any” firewall rule is a myth. To manage ESXi effectively, you need to poke specific holes in your hardware and software firewalls.
The Core Management Ports
These are the “must-haves” for basic connectivity between vCenter, the vSphere Client, and the Host.
| Port | Protocol | Source | Destination | Purpose |
| 443 | TCP | Management Workstation | vCenter / ESXi | vSphere Client / SDK: The primary port for the Web Client and API access. |
| 902 | TCP/UDP | vCenter Server | ESXi Host | vCenter Agent (vpxa): vCenter uses this to send data to the host and receive heartbeats. |
| 902 | TCP | Management Workstation | ESXi Host | VM Console: Required to open the “Remote Console” (MKS) to a virtual machine. |
| 80 | TCP | vCenter / Workstation | ESXi Host | HTTP: Used for redirecting to 443 and for some legacy file downloads. |
Advanced Feature Ports
If you are using specific vSphere features like vMotion, HA, or specialized storage, you need these additional ports open:
1. vMotion (Live Migration)
- 8000 (TCP): Required for vMotion traffic.
- 2049 (TCP/UDP): If using NFS storage for the virtual disks.
2. vSphere High Availability (HA)
- 8182 (TCP/UDP): Used by the Fault Domain Manager (FDM) agent for inter-host communication and election of the master host.
3. Provisioning & Deployment
- 69 (UDP): TFTP, used for PXE booting ESXi for Auto Deploy.
- 4012 (TCP): Used by the Auto Deploy service.
4. Troubleshooting & Monitoring
- 22 (TCP): SSH access to the ESXi Shell.
- 161 / 162 (UDP): SNMP polling and traps for hardware monitoring.
Troubleshooting “Host Disconnected”
If your host shows as “Not Responding” in vCenter, check these three things in order:
- Ping: Can the vCenter server ping the ESXi management IP?
- Port 902: From the vCenter server, try to telnet to the host on port 902 (
telnet <host-ip> 902). If it fails, the heartbeat can’t get through. - DNS: VMware is extremely sensitive to DNS. Ensure forward and reverse lookups work for both the vCenter and the Host.
Lazy Admin Tip 💡
Don’t memorize every port! Use the VMware Ports and Protocols Tool (the official online matrix). It allows you to select your source and destination products and generates a custom firewall rule list for you.
A high resolution pdf can be downloaded here Connections and Ports in ESX and ESXi
#VMware #vSphere #Networking #SysAdmin #Firewall #DataCenter #ESXi #ITOps #LazyAdmin #Connectivity
Fix vCenter Performance Overview Error: “Navigation to the webpage was cancelled” (1014454)

If your Performance Overview tab is showing a blank screen or a “navigation cancelled” error, it usually means the vSphere Client can’t reach the underlying stats reporting service. This often happens after a DNS change, an upgrade, or when a third-party app steals a required port.
Follow these troubleshooting steps in order to restore your performance charts.
Step 1: Check the vCenter Web Management Service
The performance tab isn’t part of the core vCenter service; it runs on a separate web management service.
- Log into the vCenter Server.
- Open Services.msc.
- Verify that VMware VirtualCenter Management Webservices is started. If it is, try restarting it.
Step 2: Bypass DNS (The .xml Edit)
If vCenter is having trouble resolving its own FQDN, the Performance tab will fail to load.
- Navigate to:
C:\Program Files\VMware\Infrastructure\VirtualCenter Server\extensions\com.vmware.vim.stats.report\ - Open extension.xml in a text editor (as Administrator).
- Locate the line:
<url>https://vcenter-hostname:8443/statsreport/vicr.do</url> - Change the hostname to the Static IP address of your vCenter server.
- Restart the vCenter Web Management Service.
Step 3: Check for Port Conflicts (Port 8443)
Performance Overview uses port 8443. Sometimes other web services (like IIS or Apache) grab this port first.
- The Test: Stop the “VMware VirtualCenter Management Webservices.”
- Open Command Prompt and run:
telnet <vCenter-IP> 8443 - The Result: If the port responds while the VMware service is stopped, another application is interfering. You will need to identify that app or change the vCenter web port.
Step 4: Browser & Proxy Settings
The vSphere client uses the local Internet Explorer engine to render the performance tab.
- Open Internet Options on your workstation.
- Go to the Connections tab > LAN Settings.
- Uncheck Use automatic configuration script and Proxy server.
- If the issue is only happening on external workstations, ensure the Windows Firewall on the vCenter server is allowing traffic on port 8443.
#VMware #vSphere #vCenter #SysAdmin #Virtualization #Troubleshooting #DataCenter #TechTips #LazyAdmin #CloudAdmin #ITPro
Syslog Server storage logs size calculation

Upgrading your syslog retention is a great move for troubleshooting depth, but as your math shows, it comes with a significant increase in storage demands. Moving from 4GB to 40GB is a 10x jump, so ensuring your volume can handle the growth is critical.
Here is the breakdown of the calculation and the step-by-step guide to applying these changes.
📊 Syslog Storage Planning
Before modifying configuration files, verify your available disk space. Using your specific requirements for 100 hosts:
| Variable | Current Setting | Desired Setting |
| Max Log Size | 2 MB | 10 MB |
| Rotation Count | 20 Files | 40 Files |
| Retention per Host | 40 MB | 400 MB |
| Total Storage (100 Hosts) | 4,000 MB (4GB) | 40,000 MB (40GB) |
⚠️ A Note on Scalability
While you are planning for 100 hosts, keep in mind that the VMware Syslog Collector for Windows is officially supported for up to 30 hosts.
- The Risk: Beyond 30 hosts, the service may stop responding or drop logs without an error message.
- The Fix: If you need to support 100 hosts reliably, consider deploying multiple collectors or moving to a high-scale solution like VMware vRealize Log Insight.
🛠️ How to Modify Syslog Collector Configuration
To apply your new 10MB / 40 Rotate policy, you must manually edit the configuration XML.
1. Locate and Backup
Before editing, create a copy of the configuration file.
- vCenter 6.0:
%PROGRAMDATA%\VMware\vCenterServer\cfg\vmsyslogcollector\config.xml - vCenter 5.5 & older:
%PROGRAMDATA%\VMware\VMware Syslog Collector\vmconfig-syslog.xml
2. Edit the XML
Open the copy in a text editor (like Notepad++) and locate the <defaultValues> section. Update the values as follows:
<defaultValues> <port>514</port> <protocol>TCP,UDP</protocol> <maxSize>10</maxSize> <rotate>40</rotate> <sslPort>1514</sslPort></defaultValues>
3. Swap and Restart
- Stop the Service: Open
services.mscand stop the VMware Syslog Collector. - Replace File: Delete the original
config.xmland rename your modified copy to the original filename. - Start the Service: Restart the VMware Syslog Collector.
Lazy Admin Tip: If the logs don’t start flowing immediately, you may need to restart the syslog service on the ESXi hosts themselves to re-establish the connection to the server.
#VMware #vSphere #Syslog #DataCenter #Storage #SysAdmin #ITPro #Virtualization #LogManagement #LazyAdmin #TechGuide