
SysAdmin Tips
Windows Server 2008 R2 Stuck in Recovery Loop? Here’s the Fix | Lazy Admin Blog

A sudden power failure is the ultimate “stress test” for a server, and sometimes the OS fails that test, landing you in an endless loop of Startup Repair. If F8 > Last Known Good Configuration didn’t save your skin, it’s time to break out the installation media.
The Prerequisites
Before you start, ensure you have your Windows Server 2008 R2 Installation Disc (or a bootable USB) ready.
- Boot from the media.
- Select your language/input settings and click Next.
- Select Repair your computer.
- Choose the OS you want to fix and click Next.
- Select Command Prompt from the System Recovery Options.
Method 1: The System File Checker (SFC)
If the power cut corrupted a core system file, SFC is your first line of defense. It compares your system files against the “known good” versions on the disc.
- In the Command Prompt, type:
sfc /scannow - Wait: This can take a while. If it finds and fixes errors, reboot and see if the loop is broken.
Method 2: Rebuilding the BCD
Sometimes the boot configuration data gets scrambled. This command scans for Windows installations and lets you add them back to the boot list.
- In the Command Prompt, type:
Bootrec /RebuildBcd - If it finds a Windows installation, press Y to add it to the boot list.
Method 3: The “Nuclear” Boot Repair
If the Master Boot Record (MBR) or the boot sector itself is toast, you need to rewrite them entirely. This is the heavy-duty fix for when the BIOS simply can’t find where Windows starts.
Run these three commands in order:
- Fix the MBR:
BOOTREC /FIXMBR - Fix the Boot Sector:
BOOTREC /FIXBOOT - Force the Update:
D:\boot\Bootsect.exe /NT60 All(Note: Replace D: with the actual drive letter of your installation disc).
Stop Brute Force Cold: How to Rename the Local Administrator via GPO | Lazy Admin Blog

The “Administrator” account is a universal target. Because every Windows machine has one by default, hackers already have 50% of the login equation—the username. By renaming this built-in account across your entire Active Directory domain, you significantly lower the risk of automated brute-force attacks.
Best of all? You don’t have to touch a single workstation. We can do this globally using Group Policy Preferences (GPP).
Step 1: Create or Edit your GPO
- Open the Group Policy Management console (
gpmc.msc). - Create a new GPO (e.g., “Security – Rename Local Admin”) or edit an existing one linked to your target Workstations or Servers OU.
- Right-click the GPO and select Edit.
Step 2: Configure the Local User Preference
Navigate to the following path within the editor: Computer Configuration > Preferences > Control Panel Settings > Local Users and Groups
- Right-click Local Users and Groups and select New > Local User.
- Configure the following settings in the dialog box:
- Action: Select Update.
- User name: Select Administrator (built-in) from the dropdown. (Using the built-in identifier ensures the rename works even if the account was previously renamed).
- Rename to: Enter your new, non-obvious username (e.g.,
SrvManager_Admin). - Full name: Enter a descriptive name.
- Password: You can optionally reset the password here, though using LAPS (Local Administrator Password Solution) is recommended for password management.
Step 3: Deployment & Verification
By default, Group Policy refreshes every 90 minutes. If you want to see the change immediately on a specific client, run the following command in an elevated prompt:
DOS
gpupdate /force
Is it working?
If the name hasn’t changed, use the GPResult tool to see if the policy is being applied to the computer object:
DOS
gpresult /r
Troubleshooting Tips:
- OU Check: Ensure the Computer object is actually inside the OU where the GPO is linked.
- Security Filtering: Verify that Authenticated Users or Domain Computers have “Read” and “Apply Group Policy” permissions in the GPO’s Delegation tab.
- Replication: If some sites see the change and others don’t, check your Domain Controller replication status.
Why this is a “Lazy Admin” Win
Instead of using scripts or manual intervention, GPO Preferences handle the logic for you. If you ever need to change the name again, you update one field in the GPO, and the entire domain follows suit.
SRM Plugin Down? How to Generate Diagnostic Logs via the Command Line | Lazy Admin Blog

In a high-pressure recovery situation, the last thing you want to see is the “SRM Connection Failed” error in your vSphere Client. If you can’t access the SRM interface to click “Gather Logs,” you have to go straight to the source.
Site Recovery Manager includes a standalone support script that packages all necessary diagnostics directly from the Windows Server filesystem, even if the SRM service itself is struggling.
Step 1: Locate the Support Script
Log into the Windows Server where SRM is installed and navigate to the \bin\ directory. The path varies slightly depending on your version and OS architecture:
- 64-bit Windows (Standard):
C:\Program Files\VMware\VMware vCenter Site Recovery Manager\bin\ - 32-bit Windows (Legacy):
C:\Program Files (32 bit)\VMware\VMware vCenter Site Recovery Manager\bin\ - SRM 1.0 (Vintage):
C:\Program Files\VMware\VMware Site Recovery Manager\bin\
Step 2: Generate the Bundle
- Look for the file named
srm-support.wsf. - Double-click the file to execute it.
- Wait a few moments. A compressed log bundle will appear on the Desktop of the current user, named in this format:
srm-plugin-support-MM-DD-YYYY-hh-mm.zip.
Step 3: Label Your Logs (The “Pro” Tip)
VMware Support will often need logs from both the Protected and Recovery sites. Because the log bundles look identical, VMware highly recommends renaming the files before uploading them to the FTP portal:
protected-srm-support-MM-DD-YYYY.ziprecovery-srm-support-MM-DD-YYYY.zip
Don’t Forget the SRA Logs!
If your issue involves storage replication, VMware will also need the Storage Replication Adapter (SRA) logs. These are usually tucked away in vendor-specific folders:
...\VMware vCenter Site Recovery Manager\scripts\SAN\<SRA Vendor Name>\log\C:\Program Files\<SRA Vendor Name>\
Manual Configuration Check
If you need to verify your extension ID or database connection strings manually, you can find the core XML configuration files in the \config\ directory:
extension.xmlvmware-dr.xml
Locked Out of Cisco UCS? How to Recover the Master Admin Password | Lazy Admin Blog

It’s the nightmare scenario: you need to make a critical service profile change, but the only admin password is lost or forgotten. Because Cisco UCS Manager doesn’t store passwords in a reversible format, you can’t “view” the old one. Instead, you must perform a password reset by power-cycling the Fabric Interconnects (FIs) and interrupting the boot sequence.
⚠️ Warning: This procedure requires a physical power cycle of the Fabric Interconnects. In a production environment, this will cause a temporary disruption in management connectivity and potentially data traffic if not handled correctly in a cluster.
Phase 1: The Pre-Flight Check
Before you pull the power cables, you need two pieces of information. If you still have read-only access or a lower-privilege account, gather these now:
- Identify the Roles: In a cluster, you must know which FI is Primary and which is Subordinate.
- Path: Equipment > Fabric Interconnects > [FI Name] > General > High Availability Details.
- Verify Firmware Versions: You must know the exact Kernel and System firmware versions currently running.
- Path: Equipment > Firmware Management > Installed Firmware.
Phase 2: Password Recovery (The Process)
Scenario A: Standalone Configuration
If you only have one Fabric Interconnect, the process is straightforward but requires downtime.
- Connect: Attach a console cable physically to the FI console port.
- Power Cycle: Turn the FI off and then back on.
- Interrupt Boot: As it boots, repeatedly press Ctrl+L or Ctrl+Shift+R until you see the
loader >prompt. - Boot Kernel: Load the kickstart/kernel image:
loader > boot /installables/switch/ucs-6100-k9-kickstart.x.x.x.gbin - Enter Config:
Fabric(boot)# config terminal - Reset Password:
Fabric(boot)(config)# admin-password YourNewPassword123 - Load System: Exit config mode and boot the system image:
Fabric(boot)# load /installables/switch/ucs-6100-k9-system.x.x.x.bin
Scenario B: Cluster Configuration (High Availability)
In a cluster, the order of operations is vital to ensure the database remains synchronized.
- Subordinate First: Power cycle the Subordinate FI and interrupt its boot to the
loader >prompt. Leave it there. - Primary Second: Power cycle the Primary FI and interrupt its boot to the
loader >prompt. - Reset on Primary: Follow the “Standalone” steps (4 through 7) on the Primary FI console.
- Bring up Subordinate: Once the Primary is back up and you can log into UCS Manager, go to the Subordinate console and boot its kernel and system images normally from the loader prompt.
Important Notes
- Clear Text: When you type the
admin-passwordcommand in the boot loader, the password displays in clear text on the screen. Ensure no one is shoulder-surfing! - Strong Passwords: UCS Manager requires at least one capital letter and one number.
- Console Access: This cannot be done via SSH. You must have physical or terminal server access to the console port.
#CiscoUCS #DataCenter #CiscoProphet #SysAdmin #Networking #ITTech #Cisco #UCSManager #LazyAdmin #Infrastructure
Emergency Log Collection: Generating and Uploading ESXi Support Bundles | Lazy Admin Blog
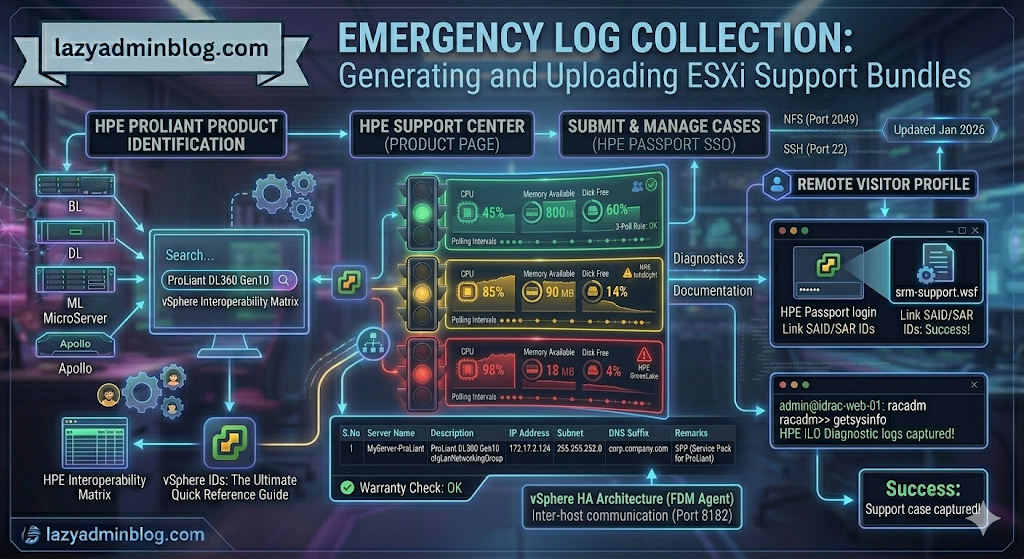
If you can’t generate a support bundle through vCenter, your best bet is the ESXi Shell. By running vm-support directly on the host, you bypass the management overhead and get your diagnostics faster.
Step 1: Generate Logs via SSH (CLI)
Before running the command, identify a datastore with at least 5-10GB of free space to store the compressed bundle.
- SSH into your ESXi host using Putty.
- Navigate to your chosen datastore:
cd /vmfs/volumes/YOUR_DATASTORE_NAME/ - Run the support command and redirect the output to a specific file name:Bash
vm-support -s > vm-support-HostName-$(date +%Y%m%d).tgz-sstands for “stream,” directing the output to the file you specified.- Tip: Using
$(date +%Y%m%d)automatically adds the current date to the filename.
- Once finished, use the vSphere Datastore Browser to download the
.tgzfile to your local workstation.
Step 2: Uploading to VMware via FileZilla
VMware provides a public FTP/SFTP landing zone for Support Requests (SR). While many admins use the browser, a dedicated client like FileZilla is much more reliable for large multi-gigabyte bundles.
Configure FileZilla for VMware
- Set Transfer Mode: Go to Transfer > Transfer type > Binary. This prevents file corruption during the upload.
- Open Site Manager: (File > Site Manager) and create a new site:
- Host:
ftpsite.vmware.com - Protocol: FTP (or SFTP if requested by support)
- Logon Type: Normal
- User:
inbound - Password:
inbound
- Host:
Navigating the Remote Site
- Connect to the server.
- Create your SR Folder: In the “Remote Site” pane, right-click and select Create Directory. Name it exactly after your 10-digit Support Request number (e.g.,
2612345678). - Upload: Locate your
.tgzbundle in the left pane (Local Site), right-click it, and select Upload.
Important Note: For security, the VMware FTP is “blind.” You will not see your files or folders once they are created/uploaded. Don’t panic if the directory looks empty after the transfer completes; as long as the transfer queue shows 100%, VMware has it.
#VMware #ESXi #Troubleshooting #SysAdmin #DataCenter #Virtualization #ITOps #FileZilla #LazyAdmin #TechTips
Nuclear Option: How to Force Power Off a Hung VM via SSH | Lazy Admin Blog

We’ve all been there: a Windows Update goes sideways or a database lock freezes a guest OS, and suddenly the “Shut Down Guest” command is greyed out or simply times out. When the GUI fails you, the ESXi Command Line (esxcli) is your best friend.
Step 1: Identify the “World ID”
In ESXi terminology, every running process is assigned a World ID. To kill a VM, you first need to find this unique identifier.
- SSH into your ESXi host using Putty.
- Run the following command to see all active VM processes:Bash
esxcli vm process list - Locate your hung VM in the list. Look for the World ID (a long string of numbers). You will also see the Display Name and the path to the
.vmxfile to confirm you have the right one.
Step 2: Execute the Kill Command
ESXi offers three levels of “force” to stop a process. It is best practice to try them in order:
- Soft: The most graceful. It attempts to give the guest OS a chance to shut down cleanly.
- Hard: Equivalent to pulling the power cable. Immediate cessation of the VMX process.
- Force: The “last resort.” Use this only if ‘Hard’ fails to clear the process from the kernel.
The Syntax:
Bash
esxcli vm process kill --type=[soft,hard,force] --world-id=WorldNumber
Example (Hard Kill): esxcli vm process kill -t hard -w 5241852
Step 3: Verify the Result
After running the kill command, it may take a few seconds for the host to clean up the memory registration. Run the list command again to ensure it’s gone:
Bash
esxcli vm process list | grep "Your_VM_Name"
If the command returns nothing, the VM is officially offline, and you can attempt to power it back on via the vSphere Client.
Lazy Admin Tip 💡
If esxcli still won’t kill the VM, the process might be stuck in an “I/O Wait” state (usually due to a failed storage path). In that rare case, you might actually need to restart the Management Agents (services.sh restart) or, in extreme cases, reboot the entire host.
#VMware #vSphere #ESXi #SysAdmin #Troubleshooting #Virtualization #ITOps #LazyAdmin #ServerManagement #DataCenter
Fixing Server Manager Error 0x800706BE: The Missing MUM/CAT Mystery | Lazy Admin Blog

If your Server Manager is blank, showing a yellow bang, or refusing to refresh with a “Remote Procedure Call Failed” error, you aren’t looking at a network issue—you’re looking at a corrupted Windows Update store.
When Windows cannot validate the files in the C:\Windows\Servicing\Packages directory, the Server Manager discovery process crashes. Here is how to perform manual surgery on the CBS store to fix it.
The Symptom
- Error Code: 0x800706BE
- Event ID: 1601 (Microsoft-Windows-ServerManager/Operational)
- Message: Could not discover the state of the system.
Step 1: The Diagnostics (CheckSUR)
First, we need to know exactly which files are broken.
- Download and run the System Update Readiness Tool (CheckSUR) (KB947821) or, on newer versions of Windows Server, run:
DISM.exe /Online /Cleanup-image /Scanhealth - Once finished, open the log file:
%Systemroot%\Logs\CBS\Checksur.log - Look for lines starting with
(f) CBS MUM Corruptor(f) CBS MUM Missing. These are your “targets.”
Step 2: Gain Control of the Packages Folder
By default, even an Administrator cannot write to the Servicing folder. You must take ownership:
DOS
takeown /F C:\Windows\Servicing\Packages /D y /Ricacls C:\Windows\Servicing\Packages /save %temp%\AclFile /Ticacls C:\Windows\Servicing\Packages /grant %username%:F /T
Step 3: Extract and Replace the “Grafts”
Now you need to “borrow” healthy files from the original Update files to replace your corrupt ones.
- Download the KB: Download the
.msufile for the KB number listed as corrupt in your log. - Expand the MSU:
expand -F:* Windows6.1-KB978601-x64.msu C:\Repair - Expand the CAB: Inside that folder, find the
.cabfile and expand it too:expand -F:* Windows6.1-KB978601-x64.cab C:\Repair\CAB - The Extraction: Inside the
CABfolder, findupdate.mumandupdate.cat.
Step 4: The Rename and Replace
This is where precision matters. You must rename those generic files to match the exact long string found in your Checksur.log.
- Example Rename:
- From:
update.mum - To:
Package_for_KB978601~31bf3856ad364e35~amd64~~6.0.1.0.mum
- From:
- Move: Copy these renamed files into
C:\Windows\Servicing\Packages.
Step 5: Verify the Fix
Close and reopen Server Manager. It should now trigger a fresh discovery without the RPC error. If it still fails, check the Checksur.log again—you likely have more missing packages to replace!
Lazy Admin Tip 💡
If you have another server running the exact same OS and patch level, you can often just copy the healthy .mum and .cat files from the “Good” server’s C:\Windows\Servicing\Packages folder to the “Bad” one. It’s much faster than manually expanding CAB files!
#WindowsServer #SysAdmin #ServerManager #Troubleshooting #ITOps #Microsoft #TechSupport #LazyAdmin #WindowsUpdate
The Permission Panic: How to Backup and Restore Share & NTFS Permissions | Lazy Admin Blog

It only takes one “Inheritance” checkbox error to bring a department to a standstill. If you are migrating a file server or just performing routine maintenance, having a permission backup is your “Undo” button.
1. Share Permissions (The Registry Method)
“Share” permissions (the ones you see in the Sharing tab) are not stored on the files themselves; they are stored in the Windows Registry.
To Backup: Open a Command Prompt (Admin) and run:
DOS
reg export HKLM\SYSTEM\CurrentControlSet\Services\LanmanServer\Shares shareperms.reg
To Restore: Simply import the file back on the new or repaired server:
DOS
reg import shareperms.reg
Note: You must restart the ‘Server’ service or reboot for the shares to reappear.
2. NTFS Permissions (The icacls Method)
NTFS permissions (the “Security” tab) are much more complex. We use the built-in icacls tool to handle these.
The Backup Command:
DOS
icacls d:\data /save ntfsperms.txt /t /c
- /t: Recurses through all subfolders.
- /c: Continues even if it hits a single file error (like a long file path).
The “Tricky” Restore Command: When restoring, icacls treats the paths inside the text file as relative. If your backup file says “Data\Folder1,” and you try to restore to D:\Data, it will look for D:\Data\Data\Folder1.
The Correct Syntax:
DOS
icacls d:\ /restore ntfsperms.txt
Lazy Admin Warning: Always point the restore command one level above the folder you backed up. If you backed up
D:\Data, restore toD:\.
Understanding the “Secret Code” (SDDL)
If you open your ntfsperms.txt file, you’ll see strings like D:AI(A;ID;FA;;;BA). This is Security Descriptor Definition Language (SDDL).
- BA = Built-in Administrators
- SY = Local System
- AU = Authenticated Users
It looks like gibberish, but to the Windows Kernel, it is a perfect map of your security infrastructure.
#WindowsServer #SysAdmin #DisasterRecovery #NTFS #FileServer #TechTips #CyberSecurity #ITAdmin #LazyAdmin
Troubleshooting VMware Tools Upgrade Failures on Windows Server 2003 | Lazy Admin Blog

In the world of legacy infrastructure, Windows Server 2003 virtual machines (VMs) occasionally hit a “brick wall” during VMware Tools upgrades. While VMware continues to investigate the root cause, the community has identified a manual “scrubbing” process to bypass the installer errors and force a clean installation.
🛑 Pre-Requisites & Data Collection
Before performing a manual registry cleanup, VMware Support recommends gathering the following data to help identify the underlying issue:
- Version Mapping: Note the current “from” version and the target “to” version.
- Upgrade Method: Are you using the “Interactive” installer, “Silent” switches, or vCenter’s “Automatic” update?
- Historical Data: Open the Windows Event Viewer, search for Event Source: MsiInstaller, and look for Event ID: 1034 to find traces of previous installation attempts.
🛠️ The Fix: Manual Registry & System Scrubbing
[!CAUTION] Warning: This procedure involves modifying the Windows Registry. Incorrect changes can destabilize your OS. Always take a full VM Snapshot and a Registry Backup before proceeding.
1. Registry Cleanup (Installer Keys)
Log in as an Administrator, open regedit, and navigate to/delete the following keys if they exist:
HKEY_CLASSES_ROOT\Installer\Features\05014B32081E884E91FB41199E24004HKEY_CLASSES_ROOT\Installer\Products\05014B32081E884E91FB41199E24004HKEY_LOCAL_MACHINE\SOFTWARE\Classes\Installer\Features\05014B32081E884E91FB41199E24004HKEY_LOCAL_MACHINE\SOFTWARE\Classes\Installer\Products\05014B32081E884E91FB41199E24004HKEY_LOCAL_MACHINE\SOFTWARE\Microsoft\Windows\CurrentVersion\Installer\UserData\S-1-5-18\Components\B150AC107B12D11A9DD0006794C4E25HKEY_LOCAL_MACHINE\SOFTWARE\Microsoft\Windows\CurrentVersion\Uninstall\{3B410500-1802-488E-9EF1-4B11992E0440}HKEY_LOCAL_MACHINE\SOFTWARE\VMware, Inc.
2. Service Removal
Deep-seated services can block the new installer. Delete these keys under CurrentControlSet\Services:
VMToolsVMUpgradeHelperVMware Physical Disk Helper Servicevmvss
3. File System Cleanup
Once the registry is clear, you must remove the physical binary remnants:
- Open Windows Explorer.
- Delete the folder:
%ProgramFiles%\VMware\VMware Tools. - Restart the Virtual Machine. This step is non-negotiable as it clears the memory and releases hooks on drivers.
🚀 Final Step: Fresh Installation
After the reboot, the system will be “clean” of previous VMware Tools traces. You can now mount the VMware Tools ISO through your vSphere client and run a fresh installation.
Pro-Tip: If the VM has other VMware products installed (like vCenter Server), do not do a blanket search-and-destroy for the term “VMware” in the registry. Stick strictly to the keys listed above to avoid breaking other applications.
Reclaiming Space: How to Clean Up WinSxS on Windows Server 2008 R2

The C:\Windows\WinSxS directory is notorious for growing over time as it stores multiple versions of DLLs and backup files for Windows Updates. On a long-running Server 2008 R2 instance, this folder can easily consume 10GB–20GB of precious SSD or SAN storage.
![pic1[1]](https://i0.wp.com/lazyadminblog.com/wp-content/uploads/2015/05/pic11.png?ssl=1)
Step 1: Install Disk Cleanup (Without a Reboot)
In Server 2008 R2, the Disk Cleanup utility is technically part of the “Desktop Experience” feature. Usually, installing this requires a reboot—something most admins want to avoid.
Instead, you can install the standalone update package (KB2852386) that specifically adds Disk Cleanup functionality:
- For x64 Systems: Download KB2852386 for Windows Server 2008 R2
![pic2[1]](https://i0.wp.com/lazyadminblog.com/wp-content/uploads/2015/05/pic21.png?ssl=1)
Step 2: Launching the Cleanup Wizard
Once the update is installed, you won’t find it in the Start Menu immediately. You can launch it via the command line:
![pic8[1]](https://i0.wp.com/lazyadminblog.com/wp-content/uploads/2015/05/pic81.png?ssl=1)
- Open Run (Win + R).
- Type
cleanmgrand hit Enter. - Select your C: Drive.
![pic9[1]](https://i0.wp.com/lazyadminblog.com/wp-content/uploads/2015/05/pic91.png?ssl=1)
![pic10[1]](https://i0.wp.com/lazyadminblog.com/wp-content/uploads/2015/05/pic101.png?ssl=1)
Step 3: Cleaning System Files (The “WinSxS” Secret)
To actually shrink the WinSxS folder, you must target the Windows Update files.
![3348.diskcleanup3[1]](https://i0.wp.com/lazyadminblog.com/wp-content/uploads/2015/05/3348-diskcleanup31.png?ssl=1)
![pic11[1]](https://i0.wp.com/lazyadminblog.com/wp-content/uploads/2015/05/pic111.png?ssl=1)
- When the wizard opens, click the Clean up system files button (this requires Administrator privileges).
- The tool will scan again. Look for the new option: Windows Update Cleanup.
- Check this box along with any other items you want to remove (Service Pack Backup files, etc.).
- Click OK.
Step 4: Finalizing the Shrink
Unlike standard file deletion, the WinSxS cleanup happens during the next reboot.
- When you restart the server, you will see a message: “Configuring Windows updates, X% complete. Do not turn off your computer.” * Do not interrupt this process. This is the system physically removing the redundant files from the WinSxS directory.
![pic12[1]](https://i0.wp.com/lazyadminblog.com/wp-content/uploads/2015/05/pic121.png?ssl=1)
The Result: After the reboot, you should see a significant drop in the size of your Windows directory—often saving several gigabytes of space.
#WindowsServer #WinSxS #SysAdmin #StorageCleanup #ITPro #DataCenter #WindowsUpdate #TechTips #LazyAdmin #ServerMaintenance