
VMware
The Master List: VMware ESXi Release and Build Number History (Updated 2026) | Lazy Admin Blog

Is your host up to date? Checking the “About” section in your vSphere Client is step one, but cross-referencing that number against this list is how you confirm if you’re on a General Availability (GA) release, an Update, or an Express Patch.
vSphere ESXi 9.0 (Latest)
The new generation of the hypervisor, optimized for AI workloads and DPUs.
| Name | Version | Release Date | Build Number |
| VMware ESXi 9.0.2 | 9.0.2 | 2026-01-20 | 25148080 |
| VMware ESXi 9.0.1 | 9.0.1 | 2025-09-29 | 24957450 |
| VMware ESXi 9.0 GA | 9.0 GA | 2025-06-17 | 24755225 |
vSphere ESXi 8.0
The enterprise workhorse for 2024-2026.
| Name | Version | Release Date | Build Number |
| VMware ESXi 8.0 Update 3 | 8.0 U3 | 2024-06-25 | 24022510 |
| VMware ESXi 8.0 Update 2 | 8.0 U2 | 2023-09-21 | 22380479 |
| VMware ESXi 8.0 Update 1 | 8.0 U1 | 2023-04-18 | 21495797 |
| VMware ESXi 8.0 GA | 8.0 GA | 2022-10-11 | 20513097 |
vSphere ESXi 7.0
Note: This version introduced the new Lifecycle Manager (vLCM).
| Name | Version | Release Date | Build Number |
| VMware ESXi 7.0 Update 3w | 7.0 U3w | 2025-09-29 | 24927030 |
| VMware ESXi 7.0 Update 3 | 7.0 U3 | 2021-10-05 | 18644231 |
| VMware ESXi 7.0 GA | 7.0 GA | 2020-04-02 | 15843807 |
vSphere ESXi 6.x Legacy (Archive)
| Name | Version | Release Date | Build Number |
| VMware ESXi 6.7 Update 3 | 6.7 U3 | 2019-08-20 | 14320388 |
| VMware ESXi 6.5 Update 3 | 6.5 U3 | 2019-07-02 | 13932383 |
| VMware ESXi 6.0 Update 1a | 6.0 U1a | 2015-10-06 | 3073146 |
| VMware ESXi 6.0 GA | 6.0 GA | 2015-03-12 | 2494585 |
How to Verify Your Build Number
If you aren’t at your desk and only have SSH access to the host, you can find your build number instantly with this command:
vmware -v
Example Output:
VMware ESXi 8.0.0 build-20513097
Lazy Admin Tip 💡
Always remember the vCenter Interoperability Rule: Your vCenter Server must always be at a build version equal to or higher than your ESXi hosts. If you patch your hosts to vSphere 9.0 while vCenter is still on 8.0, your hosts will show as “Not Responding” or “Disconnected.”
#VMware #vSphere9 #ESXi #SysAdmin #Virtualization #PatchManagement #DataCenter #LazyAdmin #BuildNumbers #ITOperations
Emergency Log Collection: Generating and Uploading ESXi Support Bundles | Lazy Admin Blog
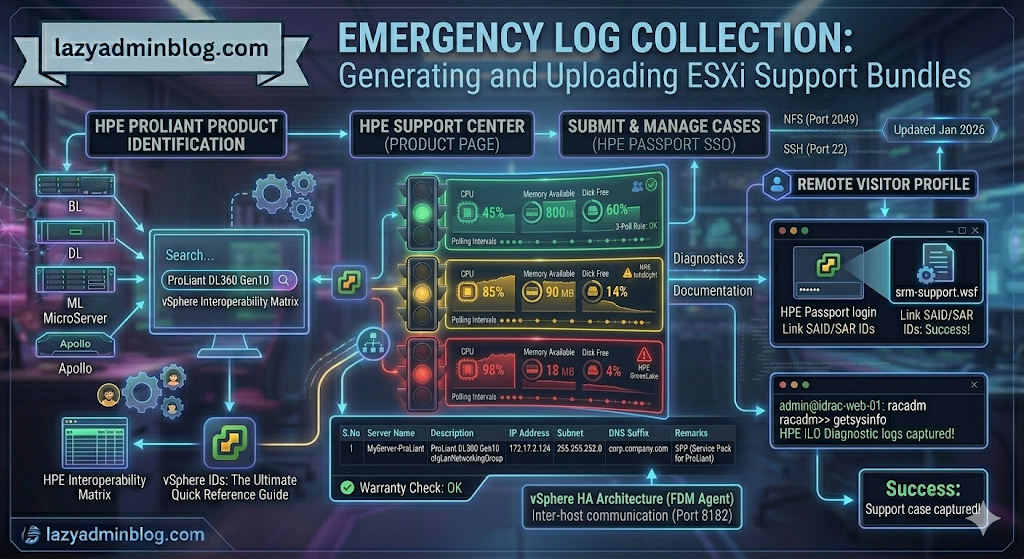
If you can’t generate a support bundle through vCenter, your best bet is the ESXi Shell. By running vm-support directly on the host, you bypass the management overhead and get your diagnostics faster.
Step 1: Generate Logs via SSH (CLI)
Before running the command, identify a datastore with at least 5-10GB of free space to store the compressed bundle.
- SSH into your ESXi host using Putty.
- Navigate to your chosen datastore:
cd /vmfs/volumes/YOUR_DATASTORE_NAME/ - Run the support command and redirect the output to a specific file name:Bash
vm-support -s > vm-support-HostName-$(date +%Y%m%d).tgz-sstands for “stream,” directing the output to the file you specified.- Tip: Using
$(date +%Y%m%d)automatically adds the current date to the filename.
- Once finished, use the vSphere Datastore Browser to download the
.tgzfile to your local workstation.
Step 2: Uploading to VMware via FileZilla
VMware provides a public FTP/SFTP landing zone for Support Requests (SR). While many admins use the browser, a dedicated client like FileZilla is much more reliable for large multi-gigabyte bundles.
Configure FileZilla for VMware
- Set Transfer Mode: Go to Transfer > Transfer type > Binary. This prevents file corruption during the upload.
- Open Site Manager: (File > Site Manager) and create a new site:
- Host:
ftpsite.vmware.com - Protocol: FTP (or SFTP if requested by support)
- Logon Type: Normal
- User:
inbound - Password:
inbound
- Host:
Navigating the Remote Site
- Connect to the server.
- Create your SR Folder: In the “Remote Site” pane, right-click and select Create Directory. Name it exactly after your 10-digit Support Request number (e.g.,
2612345678). - Upload: Locate your
.tgzbundle in the left pane (Local Site), right-click it, and select Upload.
Important Note: For security, the VMware FTP is “blind.” You will not see your files or folders once they are created/uploaded. Don’t panic if the directory looks empty after the transfer completes; as long as the transfer queue shows 100%, VMware has it.
#VMware #ESXi #Troubleshooting #SysAdmin #DataCenter #Virtualization #ITOps #FileZilla #LazyAdmin #TechTips
Nuclear Option: How to Force Power Off a Hung VM via SSH | Lazy Admin Blog

We’ve all been there: a Windows Update goes sideways or a database lock freezes a guest OS, and suddenly the “Shut Down Guest” command is greyed out or simply times out. When the GUI fails you, the ESXi Command Line (esxcli) is your best friend.
Step 1: Identify the “World ID”
In ESXi terminology, every running process is assigned a World ID. To kill a VM, you first need to find this unique identifier.
- SSH into your ESXi host using Putty.
- Run the following command to see all active VM processes:Bash
esxcli vm process list - Locate your hung VM in the list. Look for the World ID (a long string of numbers). You will also see the Display Name and the path to the
.vmxfile to confirm you have the right one.
Step 2: Execute the Kill Command
ESXi offers three levels of “force” to stop a process. It is best practice to try them in order:
- Soft: The most graceful. It attempts to give the guest OS a chance to shut down cleanly.
- Hard: Equivalent to pulling the power cable. Immediate cessation of the VMX process.
- Force: The “last resort.” Use this only if ‘Hard’ fails to clear the process from the kernel.
The Syntax:
Bash
esxcli vm process kill --type=[soft,hard,force] --world-id=WorldNumber
Example (Hard Kill): esxcli vm process kill -t hard -w 5241852
Step 3: Verify the Result
After running the kill command, it may take a few seconds for the host to clean up the memory registration. Run the list command again to ensure it’s gone:
Bash
esxcli vm process list | grep "Your_VM_Name"
If the command returns nothing, the VM is officially offline, and you can attempt to power it back on via the vSphere Client.
Lazy Admin Tip 💡
If esxcli still won’t kill the VM, the process might be stuck in an “I/O Wait” state (usually due to a failed storage path). In that rare case, you might actually need to restart the Management Agents (services.sh restart) or, in extreme cases, reboot the entire host.
#VMware #vSphere #ESXi #SysAdmin #Troubleshooting #Virtualization #ITOps #LazyAdmin #ServerManagement #DataCenter
Troubleshooting VMware Tools Upgrade Failures on Windows Server 2003 | Lazy Admin Blog

In the world of legacy infrastructure, Windows Server 2003 virtual machines (VMs) occasionally hit a “brick wall” during VMware Tools upgrades. While VMware continues to investigate the root cause, the community has identified a manual “scrubbing” process to bypass the installer errors and force a clean installation.
🛑 Pre-Requisites & Data Collection
Before performing a manual registry cleanup, VMware Support recommends gathering the following data to help identify the underlying issue:
- Version Mapping: Note the current “from” version and the target “to” version.
- Upgrade Method: Are you using the “Interactive” installer, “Silent” switches, or vCenter’s “Automatic” update?
- Historical Data: Open the Windows Event Viewer, search for Event Source: MsiInstaller, and look for Event ID: 1034 to find traces of previous installation attempts.
🛠️ The Fix: Manual Registry & System Scrubbing
[!CAUTION] Warning: This procedure involves modifying the Windows Registry. Incorrect changes can destabilize your OS. Always take a full VM Snapshot and a Registry Backup before proceeding.
1. Registry Cleanup (Installer Keys)
Log in as an Administrator, open regedit, and navigate to/delete the following keys if they exist:
HKEY_CLASSES_ROOT\Installer\Features\05014B32081E884E91FB41199E24004HKEY_CLASSES_ROOT\Installer\Products\05014B32081E884E91FB41199E24004HKEY_LOCAL_MACHINE\SOFTWARE\Classes\Installer\Features\05014B32081E884E91FB41199E24004HKEY_LOCAL_MACHINE\SOFTWARE\Classes\Installer\Products\05014B32081E884E91FB41199E24004HKEY_LOCAL_MACHINE\SOFTWARE\Microsoft\Windows\CurrentVersion\Installer\UserData\S-1-5-18\Components\B150AC107B12D11A9DD0006794C4E25HKEY_LOCAL_MACHINE\SOFTWARE\Microsoft\Windows\CurrentVersion\Uninstall\{3B410500-1802-488E-9EF1-4B11992E0440}HKEY_LOCAL_MACHINE\SOFTWARE\VMware, Inc.
2. Service Removal
Deep-seated services can block the new installer. Delete these keys under CurrentControlSet\Services:
VMToolsVMUpgradeHelperVMware Physical Disk Helper Servicevmvss
3. File System Cleanup
Once the registry is clear, you must remove the physical binary remnants:
- Open Windows Explorer.
- Delete the folder:
%ProgramFiles%\VMware\VMware Tools. - Restart the Virtual Machine. This step is non-negotiable as it clears the memory and releases hooks on drivers.
🚀 Final Step: Fresh Installation
After the reboot, the system will be “clean” of previous VMware Tools traces. You can now mount the VMware Tools ISO through your vSphere client and run a fresh installation.
Pro-Tip: If the VM has other VMware products installed (like vCenter Server), do not do a blanket search-and-destroy for the term “VMware” in the registry. Stick strictly to the keys listed above to avoid breaking other applications.
Troubleshooting vSphere Client Timeouts: “The remote server took too long to respond” | Lazy Admin Blog

If you are seeing the error “The request failed because the remote server [vCenter Name/IP] took too long to respond” specifically when checking the Storage View of a VM or Datacenter, you are likely hitting a timeout related to Single Sign-On (SSO) authentication latency.
🛠️ The Quick Fix: Manual Login
The most common trigger for this timeout is using the “Use Windows Session Credentials” checkbox during login. While convenient, this pass-through method often fails to communicate efficiently with SSO when complex domain trusts are involved.
To solve this immediately:
- Log out of the vSphere client.
- Manually type your username (e.g.,
domain\useroruser@domain.com) and password. - Do not check the “Use Windows Session Credentials” box.
🏗️ The Permanent Fix: Identity Source Configuration
If manual login works but you want to restore the functionality of session credentials, the issue lies in how vCenter communicates with your external domains.
1. Adding External Domains
Ensure your Active Directory or LDAP identity sources are correctly configured. Refer to VMware KB 2035510 for the specific procedure on adding external domains to the SSO identity sources.
2. Default Domain Order
Even if a domain is added, if it is low on the priority list, the search request may time out before finding the user.
- Log into the vSphere Web Client as an SSO Administrator (
administrator@vsphere.local). - Navigate to Administration > Single Sign-On > Configuration.
- Go to the Identity Sources tab.
- Add your trusted domains to the Default Domains list.
- Reorder the domains: Move your most frequently used production domain to the top of the list.
- Save the configuration.
Monitoring Disk Command Aborts on ESXi: Identifying Storage Overload | Lazy Admin Blog

When your storage subsystem is severely overloaded, it cannot process commands within the acceptable timeframe defined by the Guest Operating System. The result? Disk Command Aborts. For Windows VMs, this usually triggers after 60 seconds of silence from the storage array.
Aborted commands are a critical red flag indicating that your storage hardware is overwhelmed and unable to meet the host’s performance expectations. Monitoring this parameter is essential for proactive datacenter management.
Here is how you can track these aborts using two primary methods: the vSphere Client and esxtop.
💻 Method 1: vSphere Client (Graphical Interface)
This method provides a visual, historical look at command aborts across your infrastructure.
- Navigate to Hosts and Clusters.
- Select the object you want to monitor (Host or Cluster).
- Click on the Monitor tab, then Performance, and select Advanced.
- Click Chart Options.
- Switch the metric grouping to Disk.
- Select Commands aborted from the list of measurements.
- Click OK.
🛠️ Method 2: esxtop (Command Line Interface)
For real-time, granular troubleshooting, esxtop is the definitive tool. It monitors the ABRTS/s (Aborts per Second) field, specifically tracking SCSI aborts.
Steps to Configure esxtop for Aborts:
- Open Putty and log in to your ESXi host via SSH.
- Type
esxtopand press Enter. - Type
uto switch to the Disk Device view. - Type
fto change the field settings. - Type
Lto select Error stats. - Press
Enter, then pressWto save these settings for future sessions.
You will now see the ABRTS/s column. This number represents the SCSI commands aborted by the guest VM during the 1-second collection interval.
📈 Thresholds and Interpretation
If you are deploying a monitoring tool, the critical threshold for ABRTS/s is 1. A value of 1 or higher means SCSI commands are actively being aborted by the guest OS because the storage is not responding.
What is Ideal?
In an ideal scenario, ABRTS/s should always be 0.
What is Real-World?
In a busy production environment, you may see this value fluctuate between 0 and 0.xx. This occurs during “peak hours”—for instance, when multiple servers on the host are running disk-intensive backup operations simultaneously, leading to temporary storage saturation. However, any consistent spike above 1 requires immediate investigation into path failures, array congestion, or complete storage unresponsiveness.
Fix vCenter Performance Overview Error: “Navigation to the webpage was cancelled” (1014454)

If your Performance Overview tab is showing a blank screen or a “navigation cancelled” error, it usually means the vSphere Client can’t reach the underlying stats reporting service. This often happens after a DNS change, an upgrade, or when a third-party app steals a required port.
Follow these troubleshooting steps in order to restore your performance charts.
Step 1: Check the vCenter Web Management Service
The performance tab isn’t part of the core vCenter service; it runs on a separate web management service.
- Log into the vCenter Server.
- Open Services.msc.
- Verify that VMware VirtualCenter Management Webservices is started. If it is, try restarting it.
Step 2: Bypass DNS (The .xml Edit)
If vCenter is having trouble resolving its own FQDN, the Performance tab will fail to load.
- Navigate to:
C:\Program Files\VMware\Infrastructure\VirtualCenter Server\extensions\com.vmware.vim.stats.report\ - Open extension.xml in a text editor (as Administrator).
- Locate the line:
<url>https://vcenter-hostname:8443/statsreport/vicr.do</url> - Change the hostname to the Static IP address of your vCenter server.
- Restart the vCenter Web Management Service.
Step 3: Check for Port Conflicts (Port 8443)
Performance Overview uses port 8443. Sometimes other web services (like IIS or Apache) grab this port first.
- The Test: Stop the “VMware VirtualCenter Management Webservices.”
- Open Command Prompt and run:
telnet <vCenter-IP> 8443 - The Result: If the port responds while the VMware service is stopped, another application is interfering. You will need to identify that app or change the vCenter web port.
Step 4: Browser & Proxy Settings
The vSphere client uses the local Internet Explorer engine to render the performance tab.
- Open Internet Options on your workstation.
- Go to the Connections tab > LAN Settings.
- Uncheck Use automatic configuration script and Proxy server.
- If the issue is only happening on external workstations, ensure the Windows Firewall on the vCenter server is allowing traffic on port 8443.
#VMware #vSphere #vCenter #SysAdmin #Virtualization #Troubleshooting #DataCenter #TechTips #LazyAdmin #CloudAdmin #ITPro
Top VMware ESXi & vSphere Interview Questions

Preparing for a Virtualization role? This guide covers everything from legacy ESX vs. ESXi differences to advanced HA and DRS logic.
🔄 The Evolution: ESX vs. ESXi
- Service Console: ESX had a Service Console (based on RHEL); ESXi is “thin” and has no console, leading to a smaller footprint and faster boots.
- Hardware: ESXi can be purchased as an embedded hypervisor directly on hardware.
- Health Checks: ESXi features built-in server health status monitoring.
🛡️ High Availability (HA) 5.0 Deep Dive
In vSphere 5.0, the HA architecture moved from a Primary/Secondary model to a Master/Slave concept using the FDM (Fault Domain Manager) agent.
| Role | Responsibilities |
| Master | Monitors host/VM availability, manages restarts, communicates with vCenter. |
| Slave | Monitors local VMs, sends status to Master, participates in elections if Master fails. |
Heartbeat Mechanisms:
- Network Heartbeat: Sent between Master and Slaves every second.
- Datastore Heartbeat: Used if the network heartbeat is lost to determine if a host is isolated or has actually failed.
🚀 vMotion & DRS (Distributed Resource Scheduler)
vMotion Prerequisites:
- Shared storage (required prior to 5.1).
- GigaBit Ethernet dedicated vMotion network (VMkernel port).
- Processor compatibility (EVC – Enhanced vMotion Compatibility).
- No active CD-ROM/ISO mounts or CPU affinity.
DRS Automation Levels:
- Manual: vCenter suggests migrations; admin executes.
- Partially Automated: vCenter handles initial VM placement; suggestions for migrations.
- Fully Automated: vCenter moves VMs automatically based on load.
💾 Storage & Networking Quick Hits
- vSAN: Aggregates local storage from ESXi hosts into a single shared datastore.
- iSCSI Port Binding: Used when multiple VMkernel ports are in the same subnet to allow multiple paths to an array.
- Path Selection Policies (PSP): Fixed, MRU (Most Recently Used), and Round Robin.
- Key Command Line Tools:
esxtop: Live performance data.vmkfstools: Virtual disk management.vmware-cmd: VM management and info.
📊 Hardware Version Comparison
| Feature | HW Version 4 (ESX 3.x) | HW Version 7 (vSphere 4.x) | HW Version 8 (vSphere 5.0) |
| Max vRAM | 64 GB | 256 GB | 1 TB |
| Max vCPU | 4 | 8 | 32 |
| USB Support | No | Yes | Yes (incl. 3.0) |
| NICs per VM | 4 | 10 | 10 |
🚀 Key Differences in Modern vSphere (7.0 & 8.0)
1. The Architecture Shift: Project Monterey & DPUs
Modern vSphere now supports DPUs (Data Processing Units). Instead of the CPU handling networking and security, these tasks are offloaded to the SmartNIC.
2. Tanzu (Kubernetes Integration)
The biggest change in vSphere 7/8 is that Kubernetes is built directly into the hypervisor. You no longer just manage VMs; you manage “Namespaces” and containers natively on ESXi.
3. vMotion Enhancements (vSphere 7+)
In version 5.0, vMotion would “stun” a VM briefly. Modern vMotion uses a “Claim” mechanism that makes migrating massive VMs (Monster VMs) almost instantaneous with zero performance impact.
4. Scalability Comparison (vSphere 5.0 vs. 8.0)
| Feature | vSphere 5.0 (Legacy) | vSphere 8.0 (Modern) |
| vCPUs per VM | 32 | 768 |
| RAM per VM | 1 TB | 24 TB |
| Hosts per Cluster | 32 | 96 |
| VMs per Cluster | 3,000 | 10,000 |
🆕 2026 Interview Questions: Modern Edition
Q: What is the “vSphere Distributed Services Engine”?
A: It is the feature that allows vSphere to use DPUs (SmartNICs) to offload infrastructure services like NSX and vSAN, freeing up the host’s CPU for application workloads.
Q: What is a “Lifecycle Manager” (vLCM)?
A: In vSphere 7+, vLCM replaced the old Update Manager (VUM). It uses a declarative model (Desired State) where you define an image for a cluster, and the hosts automatically maintain that version/driver level.
Q: What is “vSAN Express Storage Architecture” (ESA)?
A: Introduced in vSphere 8, ESA is a new way of processing data optimized for high-performance NVMe drives, removing the old “Disk Group” (Cache/Capacity) requirement.
Q: How does vSphere 8 handle AI/ML workloads?
A: Through vGPU and Device Groups, allowing VMs to span multiple physical GPUs and utilizing High-Bandwidth Memory (HBM) for massive AI model training.
#VMware #vSphere #ESXi #Virtualization #SysAdmin #TechInterview #vMotion #CloudComputing #LazyAdmin #DataCenter
How to Change the Default Snapshot Location in VMware ESXi 5

By default, VMware ESXi stores virtual machine snapshots in the same directory as the parent VM. If your primary datastore is running low on space, taking a new snapshot can fail or, worse, cause the VM to hang.

Fortunately, you can redirect these snapshots (and swap files) to a different datastore with more “breathing room.”
Phase 1: vSphere Client Configuration
Before modifying files, we need to tell the VM not to store redo logs with the parent.
- Power OFF the Virtual Machine (This is mandatory for the changes to take effect).
- Right-click the VM and select Edit Settings.
- Go to the Options tab > General > Configuration Parameters.
- Click Add Row and enter:
- Name:
snapshot.redoNotWithParent - Value:
true
- Name:
- Click OK to save and exit.
Phase 2: CLI Configuration (.vmx Modification)
Now we define exactly where those snapshots should go.
- Log into the ESXi host via SSH or the local console.
- Navigate to your VM’s home directory:Bash
cd /vmfs/volumes/[DatastoreName]/[VMName] - Open the
.vmxconfiguration file using thevieditor:Bashvi VMName.vmx - Add the following line to the file, specifying your secondary datastore path:Plaintext
workingDir = "/vmfs/volumes/Secondary-Datastore/snapshots"(Pressito insert text, thenEscfollowed by:wqto save and exit.)
Phase 3: Reloading the VM
Changes to the .vmx file aren’t picked up until the VM is reloaded in the inventory.
- Find your VM’s ID:Bash
vim-cmd vmsvc/getallvms | grep [VMName] - Note the ID number (e.g.,
13) and run the reload command:Bashvim-cmd vmsvc/reload 13
💡 Pro Tip: Keeping Swap Files in the Original Directory
By default, the workingDir parameter also moves the VM’s .vswp (Swap) file. If you only want to move the snapshots and keep the swap file with the parent VM for performance reasons, add this extra parameter in the Configuration Parameters (Phase 1):
Name: sched.swap.dir
Value: "/vmfs/volumes/Original-Datastore/VM-Directory"
#VMware #ESXi #StorageAdmin #SysAdmin #Virtualization #vSphere #TechTutorial #LazyAdmin #DataCenter #CloudComputing
How to change the thick or thin provisioning of a virtual disk

🟢 Converting Thin to Thick (Inflation)
If your datastore has plenty of space and you need to eliminate the performance “write penalty” of a thin disk, you can Inflate it.
- Preparation: Power off the VM. Ensure there are no snapshots attached to the VM, as inflation only works on the base
.vmdk. - Locate the File: Go to the VM’s Summary tab. Under Resources, right-click the datastore and select Browse Datastore.
- The “Inflate” Action: Open the VM folder and find the
.vmdkfile. Right-click it and select Inflate.- Note: If “Inflate” is greyed out, the VM is likely still powered on or is already thick-provisioned.
- Finalize: Once the task finishes, you may need to Reload the .vmx file to ensure the vSphere UI reflects the new “Thick” status.
🔵 Converting Thick to Thin (Migration)
Converting back to Thin provisioning is slightly more complex because you cannot “deflate” a disk in place. You must move the data to a new location to reclaim the space.
Method A: Migration (Requires two Datastores)
This is the cleanest way to convert a disk using Storage vMotion or an offline migration.
- Power Off the VM (required for standard Migration; not required for Storage vMotion if licensed).
- Migrate: Right-click the VM and select Migrate > Change Datastore.
- Select Format: In the migration wizard, look for the Select Virtual Disk Format dropdown and choose Thin Provision.
- Target: Select a different datastore than the current one. vSphere will copy the blocks, only writing the actual data to the destination, effectively “thinning” the disk.
Method B: Cloning (Single Datastore)
If you only have one datastore, you cannot migrate the VM to itself to change the format.
- Right-click the VM and select Clone.
- During the clone wizard, select your current datastore as the destination.
- In the Disk Format section, select Thin Provision.
- Once complete, delete the old “Thick” VM and keep the new “Thin” one.
⚠️ Important Considerations
- Backups: Always have a fresh backup. Moving or inflating disks is a heavy I/O operation.
- Lazy vs. Eager Zeroed: When inflating to Thick, vSphere usually defaults to “Lazy Zeroed” (space is reserved, but blocks aren’t cleared until written to). For maximum performance (e.g., for Database logs or VSAN), “Eager Zeroed” is preferred.
- Space Check: Before converting from Thin to Thick, ensure your datastore can handle the immediate consumption of the entire disk size.
#VMware #vSphere #Storage #ThinProvisioning #ThickProvisioning #SysAdmin #ITPro #Virtualization #LazyAdmin #CloudStorage #TechTips
- ← Previous
- 1
- 2
- 3
- Next →