
VMware
The Clean Exit: How to Safely Remove Storage Devices from ESXi | Lazy Admin Blog

In the world of storage, “unpresenting” a LUN is more than just a right-click. If you don’t follow the proper decommissioning workflow, ESXi will keep trying to talk to a ghost device, leading to host instability and long boot times.
Follow this definitive checklist and procedure to ensure your environment stays clean and APD-free.
The “Safe-to-Remove” Checklist
Before you even touch the unmount button, verify these 7 critical points:
- Evacuate Data: Move or unregister all VMs, snapshots, templates, and ISO images from the datastore.
- HA Heartbeats: Ensure the datastore is NOT being used for vSphere HA heartbeats.
- No Clusters: Remove the datastore from any Datastore Clusters or Storage DRS management.
- Coredump: Confirm the LUN isn’t configured as a diagnostic coredump partition.
- SIOC: Disable Storage I/O Control (SIOC) for the datastore.
- RDMs: If the LUN is an Raw Device Mapping, remove the RDM from the VM settings (select “Delete from disk” to kill the mapping file).
- Scratch Location: Ensure the host isn’t using this LUN for its persistent scratch partition.
Pro Tip: Check Scratch Location via PowerCLI
Use this script to verify your scratch config across a cluster:
$cluster = "YourClusterName"foreach ($esx in Get-Cluster $cluster | Get-VMHost) { Get-VMHostAdvancedConfiguration -VMHost $esx -Name "ScratchConfig.ConfiguredScratchLocation"}
Step 1: Identify your NAA ID
You need the unique Network Address Authority (NAA) ID to ensure you are pulling the right plug.
- Via GUI: Check the Properties window of the datastore.
- Via CLI: Run
esxcli storage vmfs extent list
Step 2: The Unmount & Detach Workflow
1. Unmount the File System
In the Configuration tab > Storage, right-click the datastore and select Unmount. If you are doing this for multiple hosts, use the Datastores view (Ctrl+Shift+D) to unmount from the entire cluster at once.
2. Detach the Device (The Most Important Step)
Unmounting removes the “logical” access, but Detaching tells the kernel to stop looking for the “physical” device.
- Switch to the Devices view.
- Right-click the NAA ID and select Detach.
- The state should now show as Unmounted.
Note: Detaching is a per-host operation. You must perform this on every host that has visibility to the LUN to avoid APD states.
Step 3: Cleanup the SAN & Host
Once the state is “Unmounted” across all hosts, you can safely unmap/unpresent the LUN from your SAN array.
Permanent Decommissioning
To prevent “ghost” entries from appearing in your detached list, run these commands on the host:
- List detached devices:
esxcli storage core device detached list - Remove the configuration permanently:
esxcli storage core device detached remove -d <NAA_ID>
The Master List: VMware vCenter Release & Build Number History (Updated 2026) | Lazy Admin Blog

Version tracking is the backbone of lifecycle management. Whether you are patching against the latest security vulnerability or verifying compatibility for a backup agent, you need the exact build number.
Below is the comprehensive history of vCenter Server, from the cutting-edge vSphere 9.0 down to the legacy VirtualCenter 2.5.
vCenter Server 9.0 Build Numbers (Latest)
vSphere 9.0 represents the latest shift toward AI-integrated infrastructure and cloud-native operations.
| Name | Version | Release Date | Build Number |
| vCenter Server 9.0.2.0 | 9.0.2 | 01/20/2026 | 25148086 |
| vCenter Server 9.0.1.0 | 9.0.1 | 09/29/2025 | 24957454 |
| vCenter Server 9.0 GA | 9.0.0 | 06/17/2025 | 24755230 |
vCenter Server 8.0 Build Numbers
The 8.0 Update 3 branch is the current stable “workhorse” for most enterprise environments.
| Name | Version | Release Date | Build Number |
| vCenter Server 8.0 Update 3i | 8.0.3.00800 | 02/24/2026 | 25197330 |
| vCenter Server 8.0 Update 3h | 8.0.3.00700 | 12/15/2025 | 25092719 |
| vCenter Server 8.0 Update 3g | 8.0.3.00600 | 07/29/2025 | 24853646 |
| vCenter Server 8.0 Update 3e | 8.0.3.00500 | 04/11/2025 | 24674346 |
| vCenter Server 8.0 Update 3 | 8.0.3.00000 | 06/25/2024 | 24022515 |
| vCenter Server 8.0 Update 2 | 8.0.2.00000 | 09/21/2023 | 22385739 |
| vCenter Server 8.0 Update 1 | 8.0.1.00000 | 04/18/2023 | 21560480 |
| vCenter Server 8.0 GA | 8.0.0.10000 | 10/11/2022 | 20519528 |
vCenter Server 7.0 Build Numbers
Note: vCenter for Windows was officially removed starting with version 7.0.
| Name | Version | Release Date | Build Number |
| vCenter Server 7.0 Update 3w | 7.0.3.02500 | 09/29/2025 | 24927011 |
| vCenter Server 7.0 Update 3l | 7.0.3.01400 | 03/30/2023 | 21477706 |
| vCenter Server 7.0 Update 2 | 7.0.2.00000 | 03/09/2021 | 17694817 |
| vCenter Server 7.0 GA | 7.0.0.10100 | 04/02/2020 | 15952498 |
Legacy vCenter Server Build Numbers (vSphere 4.0 – 6.7)
| Name | Version | Release Date | Build Number |
| vCenter Server 6.7 Update 3w | 6.7.0.58000 | 10/28/2024 | 24337536 |
| vCenter Server 6.5 Update 3w | 6.5.0.43000 | 07/04/2024 | 24045034 |
| vCenter Server 6.0 Update 1 | 6.0 U1 | 09/10/2015 | 3018524 |
| vCenter Server 5.5 Update 3 | 5.5 U3 | 09/16/2015 | 3000241 |
| vCenter Server 5.1 Update 3 | 5.1 U3 | 12/04/2014 | 2306353 |
| vCenter Server 5.0 GA | 5.0 GA | 08/24/2011 | 456005 |
| vCenter Server 4.1 GA | 4.1 GA | 07/13/2010 | 259021 |
| vCenter Server 4.0 GA | 4.0 GA | 05/21/2009 | 162856 |
| VirtualCenter 2.5.0 GA | 2.5.0 | 12/10/2007 | 64192 |
Quick Tips for the Lazy Admin
- Check via VAMI: For 6.7 and newer, go to
https://<vcenter-ip>:5480. The version and build are right on the login screen. - Compatibility: Before upgrading vCenter, check the VMware Interoperability Matrix. Just because vCenter 9.0 is out doesn’t mean your older ESXi 6.7 hosts can talk to it!
- VCSA Migration: If you are still on version 6.5 or 6.7, your next step is a migration to the Appliance (VCSA). There is no “in-place” upgrade for Windows-based vCenter to 7.0+.
#VMware #vSphere9 #vCenter #SysAdmin #Virtualization #Datacenter #LazyAdmin #BuildNumbers #ITOps #PatchManagement
SRM Plugin Down? How to Generate Diagnostic Logs via the Command Line | Lazy Admin Blog

In a high-pressure recovery situation, the last thing you want to see is the “SRM Connection Failed” error in your vSphere Client. If you can’t access the SRM interface to click “Gather Logs,” you have to go straight to the source.
Site Recovery Manager includes a standalone support script that packages all necessary diagnostics directly from the Windows Server filesystem, even if the SRM service itself is struggling.
Step 1: Locate the Support Script
Log into the Windows Server where SRM is installed and navigate to the \bin\ directory. The path varies slightly depending on your version and OS architecture:
- 64-bit Windows (Standard):
C:\Program Files\VMware\VMware vCenter Site Recovery Manager\bin\ - 32-bit Windows (Legacy):
C:\Program Files (32 bit)\VMware\VMware vCenter Site Recovery Manager\bin\ - SRM 1.0 (Vintage):
C:\Program Files\VMware\VMware Site Recovery Manager\bin\
Step 2: Generate the Bundle
- Look for the file named
srm-support.wsf. - Double-click the file to execute it.
- Wait a few moments. A compressed log bundle will appear on the Desktop of the current user, named in this format:
srm-plugin-support-MM-DD-YYYY-hh-mm.zip.
Step 3: Label Your Logs (The “Pro” Tip)
VMware Support will often need logs from both the Protected and Recovery sites. Because the log bundles look identical, VMware highly recommends renaming the files before uploading them to the FTP portal:
protected-srm-support-MM-DD-YYYY.ziprecovery-srm-support-MM-DD-YYYY.zip
Don’t Forget the SRA Logs!
If your issue involves storage replication, VMware will also need the Storage Replication Adapter (SRA) logs. These are usually tucked away in vendor-specific folders:
...\VMware vCenter Site Recovery Manager\scripts\SAN\<SRA Vendor Name>\log\C:\Program Files\<SRA Vendor Name>\
Manual Configuration Check
If you need to verify your extension ID or database connection strings manually, you can find the core XML configuration files in the \config\ directory:
extension.xmlvmware-dr.xml
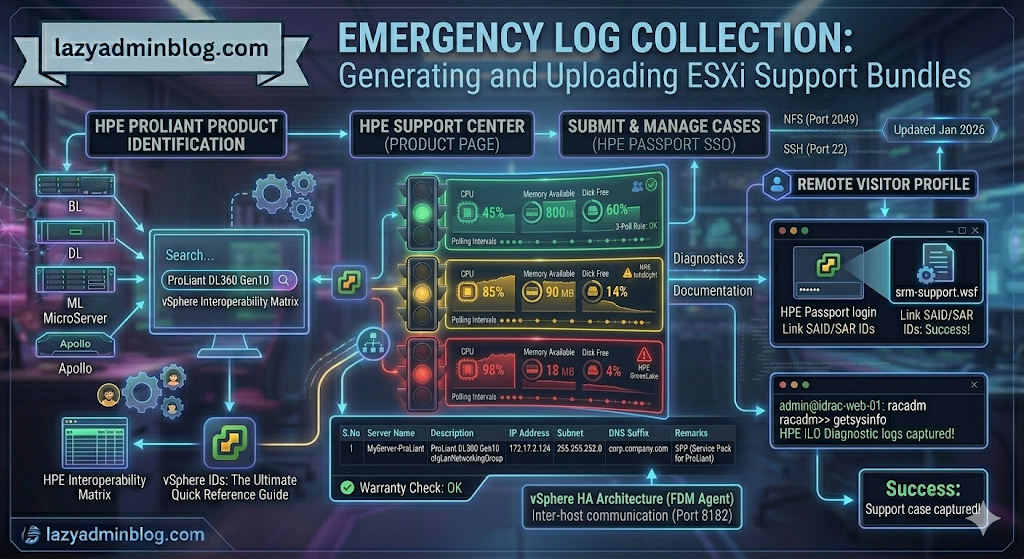
HPE Support 101: A Step-by-Step Guide to Raising ProLiant & Blade Server Cases | Lazy Admin Blog

Is your ProLiant DL360 Gen11 throwing a pre-failure alert? Or perhaps a BL460c blade has gone “No Power” in the chassis? Since the segregation of HP into HP Inc. and Hewlett Packard Enterprise (HPE), the support portal has evolved.
If you are a “Lazy Admin,” you want to get your ticket in quickly so you can get back to what matters. Here is the streamlined approach to navigating HPE Support.
Step 1: Identify Your Product Family
Before heading to the portal, confirm which category your hardware falls into. HPE generally groups them as:
- BL Series: ProLiant Server Blades (Enclosure-based)
- DL Series: Rack-mount Servers (Multi-node and Standard)
- ML Series: Tower Servers
- MicroServer: For small office/home office environments
- Apollo/Scalable Systems: High-density computing
Step 2: Use the Global Search
If you aren’t sure which specific “Packaged Cluster” or “Scalable System” you have, use the HPE Support Center search bar. Enter your specific model (e.g., ProLiant DL380 Gen10).
Why this page is useful: Before you even raise a case, the product page provides:
- Top Issues & Solutions: Often, the fix for a known firmware bug is already listed here.
- Drivers & Software: Essential for getting the latest SPP (Service Pack for ProLiant).
- Warranty Check: Crucial! HPE will not open a case for hardware replacement if the serial number isn’t linked to an active contract or warranty.
Step 3: The HP Passport Login
To submit or manage cases, you must have an HPE Passport account. This is a single sign-on (SSO) service.
You can access the login page directly here: https://support.hpe.com/hpesc/public/home/
- Tip: Link your company’s Support Agreement IDs (SAID) or Service Agreement IDs (SAR) to your Passport account before the server fails. It saves massive amounts of time during an actual emergency.
Step 4: Submitting the Case
Navigate to the Submit or manage support cases section. You will need:
- Serial Number (S/N): Found on the pull-out “luggage tag” on the front of the server or via iDRAC/iLO.
- Product Number (P/N): The specific hardware SKU.
- Logs: HPE will almost always ask for an Active Health System (AHS) log. Download this from the iLO before you start the ticket.
#HPE #ProLiant #ServerSupport #SysAdmin #DataCenter #ITOps #HPEPassport #Troubleshooting #LazyAdmin #EnterpriseIT
vSphere Ports & Connections: The Infrastructure Roadmap | Lazy Admin Blog

In a locked-down enterprise environment, the “Any-to-Any” firewall rule is a myth. To manage ESXi effectively, you need to poke specific holes in your hardware and software firewalls.
The Core Management Ports
These are the “must-haves” for basic connectivity between vCenter, the vSphere Client, and the Host.
| Port | Protocol | Source | Destination | Purpose |
| 443 | TCP | Management Workstation | vCenter / ESXi | vSphere Client / SDK: The primary port for the Web Client and API access. |
| 902 | TCP/UDP | vCenter Server | ESXi Host | vCenter Agent (vpxa): vCenter uses this to send data to the host and receive heartbeats. |
| 902 | TCP | Management Workstation | ESXi Host | VM Console: Required to open the “Remote Console” (MKS) to a virtual machine. |
| 80 | TCP | vCenter / Workstation | ESXi Host | HTTP: Used for redirecting to 443 and for some legacy file downloads. |
Advanced Feature Ports
If you are using specific vSphere features like vMotion, HA, or specialized storage, you need these additional ports open:
1. vMotion (Live Migration)
- 8000 (TCP): Required for vMotion traffic.
- 2049 (TCP/UDP): If using NFS storage for the virtual disks.
2. vSphere High Availability (HA)
- 8182 (TCP/UDP): Used by the Fault Domain Manager (FDM) agent for inter-host communication and election of the master host.
3. Provisioning & Deployment
- 69 (UDP): TFTP, used for PXE booting ESXi for Auto Deploy.
- 4012 (TCP): Used by the Auto Deploy service.
4. Troubleshooting & Monitoring
- 22 (TCP): SSH access to the ESXi Shell.
- 161 / 162 (UDP): SNMP polling and traps for hardware monitoring.
Troubleshooting “Host Disconnected”
If your host shows as “Not Responding” in vCenter, check these three things in order:
- Ping: Can the vCenter server ping the ESXi management IP?
- Port 902: From the vCenter server, try to telnet to the host on port 902 (
telnet <host-ip> 902). If it fails, the heartbeat can’t get through. - DNS: VMware is extremely sensitive to DNS. Ensure forward and reverse lookups work for both the vCenter and the Host.
Lazy Admin Tip 💡
Don’t memorize every port! Use the VMware Ports and Protocols Tool (the official online matrix). It allows you to select your source and destination products and generates a custom firewall rule list for you.
A high resolution pdf can be downloaded here Connections and Ports in ESX and ESXi
#VMware #vSphere #Networking #SysAdmin #Firewall #DataCenter #ESXi #ITOps #LazyAdmin #Connectivity
The Master List: VMware ESXi Release and Build Number History (Updated 2026) | Lazy Admin Blog

Is your host up to date? Checking the “About” section in your vSphere Client is step one, but cross-referencing that number against this list is how you confirm if you’re on a General Availability (GA) release, an Update, or an Express Patch.
vSphere ESXi 9.0 (Latest)
The new generation of the hypervisor, optimized for AI workloads and DPUs.
| Name | Version | Release Date | Build Number |
| VMware ESXi 9.0.2 | 9.0.2 | 2026-01-20 | 25148080 |
| VMware ESXi 9.0.1 | 9.0.1 | 2025-09-29 | 24957450 |
| VMware ESXi 9.0 GA | 9.0 GA | 2025-06-17 | 24755225 |
vSphere ESXi 8.0
The enterprise workhorse for 2024-2026.
| Name | Version | Release Date | Build Number |
| VMware ESXi 8.0 Update 3 | 8.0 U3 | 2024-06-25 | 24022510 |
| VMware ESXi 8.0 Update 2 | 8.0 U2 | 2023-09-21 | 22380479 |
| VMware ESXi 8.0 Update 1 | 8.0 U1 | 2023-04-18 | 21495797 |
| VMware ESXi 8.0 GA | 8.0 GA | 2022-10-11 | 20513097 |
vSphere ESXi 7.0
Note: This version introduced the new Lifecycle Manager (vLCM).
| Name | Version | Release Date | Build Number |
| VMware ESXi 7.0 Update 3w | 7.0 U3w | 2025-09-29 | 24927030 |
| VMware ESXi 7.0 Update 3 | 7.0 U3 | 2021-10-05 | 18644231 |
| VMware ESXi 7.0 GA | 7.0 GA | 2020-04-02 | 15843807 |
vSphere ESXi 6.x Legacy (Archive)
| Name | Version | Release Date | Build Number |
| VMware ESXi 6.7 Update 3 | 6.7 U3 | 2019-08-20 | 14320388 |
| VMware ESXi 6.5 Update 3 | 6.5 U3 | 2019-07-02 | 13932383 |
| VMware ESXi 6.0 Update 1a | 6.0 U1a | 2015-10-06 | 3073146 |
| VMware ESXi 6.0 GA | 6.0 GA | 2015-03-12 | 2494585 |
How to Verify Your Build Number
If you aren’t at your desk and only have SSH access to the host, you can find your build number instantly with this command:
vmware -v
Example Output:
VMware ESXi 8.0.0 build-20513097
Lazy Admin Tip 💡
Always remember the vCenter Interoperability Rule: Your vCenter Server must always be at a build version equal to or higher than your ESXi hosts. If you patch your hosts to vSphere 9.0 while vCenter is still on 8.0, your hosts will show as “Not Responding” or “Disconnected.”
#VMware #vSphere9 #ESXi #SysAdmin #Virtualization #PatchManagement #DataCenter #LazyAdmin #BuildNumbers #ITOperations
Emergency Log Collection: Generating and Uploading ESXi Support Bundles | Lazy Admin Blog
If you can’t generate a support bundle through vCenter, your best bet is the ESXi Shell. By running vm-support directly on the host, you bypass the management overhead and get your diagnostics faster.
Step 1: Generate Logs via SSH (CLI)
Before running the command, identify a datastore with at least 5-10GB of free space to store the compressed bundle.
- SSH into your ESXi host using Putty.
- Navigate to your chosen datastore:
cd /vmfs/volumes/YOUR_DATASTORE_NAME/ - Run the support command and redirect the output to a specific file name:Bash
vm-support -s > vm-support-HostName-$(date +%Y%m%d).tgz-sstands for “stream,” directing the output to the file you specified.- Tip: Using
$(date +%Y%m%d)automatically adds the current date to the filename.
- Once finished, use the vSphere Datastore Browser to download the
.tgzfile to your local workstation.
Step 2: Uploading to VMware via FileZilla
VMware provides a public FTP/SFTP landing zone for Support Requests (SR). While many admins use the browser, a dedicated client like FileZilla is much more reliable for large multi-gigabyte bundles.
Configure FileZilla for VMware
- Set Transfer Mode: Go to Transfer > Transfer type > Binary. This prevents file corruption during the upload.
- Open Site Manager: (File > Site Manager) and create a new site:
- Host:
ftpsite.vmware.com - Protocol: FTP (or SFTP if requested by support)
- Logon Type: Normal
- User:
inbound - Password:
inbound
- Host:
Navigating the Remote Site
- Connect to the server.
- Create your SR Folder: In the “Remote Site” pane, right-click and select Create Directory. Name it exactly after your 10-digit Support Request number (e.g.,
2612345678). - Upload: Locate your
.tgzbundle in the left pane (Local Site), right-click it, and select Upload.
Important Note: For security, the VMware FTP is “blind.” You will not see your files or folders once they are created/uploaded. Don’t panic if the directory looks empty after the transfer completes; as long as the transfer queue shows 100%, VMware has it.
#VMware #ESXi #Troubleshooting #SysAdmin #DataCenter #Virtualization #ITOps #FileZilla #LazyAdmin #TechTips
Nuclear Option: How to Force Power Off a Hung VM via SSH | Lazy Admin Blog

We’ve all been there: a Windows Update goes sideways or a database lock freezes a guest OS, and suddenly the “Shut Down Guest” command is greyed out or simply times out. When the GUI fails you, the ESXi Command Line (esxcli) is your best friend.
Step 1: Identify the “World ID”
In ESXi terminology, every running process is assigned a World ID. To kill a VM, you first need to find this unique identifier.
- SSH into your ESXi host using Putty.
- Run the following command to see all active VM processes:Bash
esxcli vm process list - Locate your hung VM in the list. Look for the World ID (a long string of numbers). You will also see the Display Name and the path to the
.vmxfile to confirm you have the right one.
Step 2: Execute the Kill Command
ESXi offers three levels of “force” to stop a process. It is best practice to try them in order:
- Soft: The most graceful. It attempts to give the guest OS a chance to shut down cleanly.
- Hard: Equivalent to pulling the power cable. Immediate cessation of the VMX process.
- Force: The “last resort.” Use this only if ‘Hard’ fails to clear the process from the kernel.
The Syntax:
Bash
esxcli vm process kill --type=[soft,hard,force] --world-id=WorldNumber
Example (Hard Kill): esxcli vm process kill -t hard -w 5241852
Step 3: Verify the Result
After running the kill command, it may take a few seconds for the host to clean up the memory registration. Run the list command again to ensure it’s gone:
Bash
esxcli vm process list | grep "Your_VM_Name"
If the command returns nothing, the VM is officially offline, and you can attempt to power it back on via the vSphere Client.
Lazy Admin Tip 💡
If esxcli still won’t kill the VM, the process might be stuck in an “I/O Wait” state (usually due to a failed storage path). In that rare case, you might actually need to restart the Management Agents (services.sh restart) or, in extreme cases, reboot the entire host.
#VMware #vSphere #ESXi #SysAdmin #Troubleshooting #Virtualization #ITOps #LazyAdmin #ServerManagement #DataCenter
Troubleshooting VMware Tools Upgrade Failures on Windows Server 2003 | Lazy Admin Blog

In the world of legacy infrastructure, Windows Server 2003 virtual machines (VMs) occasionally hit a “brick wall” during VMware Tools upgrades. While VMware continues to investigate the root cause, the community has identified a manual “scrubbing” process to bypass the installer errors and force a clean installation.
🛑 Pre-Requisites & Data Collection
Before performing a manual registry cleanup, VMware Support recommends gathering the following data to help identify the underlying issue:
- Version Mapping: Note the current “from” version and the target “to” version.
- Upgrade Method: Are you using the “Interactive” installer, “Silent” switches, or vCenter’s “Automatic” update?
- Historical Data: Open the Windows Event Viewer, search for Event Source: MsiInstaller, and look for Event ID: 1034 to find traces of previous installation attempts.
🛠️ The Fix: Manual Registry & System Scrubbing
[!CAUTION] Warning: This procedure involves modifying the Windows Registry. Incorrect changes can destabilize your OS. Always take a full VM Snapshot and a Registry Backup before proceeding.
1. Registry Cleanup (Installer Keys)
Log in as an Administrator, open regedit, and navigate to/delete the following keys if they exist:
HKEY_CLASSES_ROOT\Installer\Features\05014B32081E884E91FB41199E24004HKEY_CLASSES_ROOT\Installer\Products\05014B32081E884E91FB41199E24004HKEY_LOCAL_MACHINE\SOFTWARE\Classes\Installer\Features\05014B32081E884E91FB41199E24004HKEY_LOCAL_MACHINE\SOFTWARE\Classes\Installer\Products\05014B32081E884E91FB41199E24004HKEY_LOCAL_MACHINE\SOFTWARE\Microsoft\Windows\CurrentVersion\Installer\UserData\S-1-5-18\Components\B150AC107B12D11A9DD0006794C4E25HKEY_LOCAL_MACHINE\SOFTWARE\Microsoft\Windows\CurrentVersion\Uninstall\{3B410500-1802-488E-9EF1-4B11992E0440}HKEY_LOCAL_MACHINE\SOFTWARE\VMware, Inc.
2. Service Removal
Deep-seated services can block the new installer. Delete these keys under CurrentControlSet\Services:
VMToolsVMUpgradeHelperVMware Physical Disk Helper Servicevmvss
3. File System Cleanup
Once the registry is clear, you must remove the physical binary remnants:
- Open Windows Explorer.
- Delete the folder:
%ProgramFiles%\VMware\VMware Tools. - Restart the Virtual Machine. This step is non-negotiable as it clears the memory and releases hooks on drivers.
🚀 Final Step: Fresh Installation
After the reboot, the system will be “clean” of previous VMware Tools traces. You can now mount the VMware Tools ISO through your vSphere client and run a fresh installation.
Pro-Tip: If the VM has other VMware products installed (like vCenter Server), do not do a blanket search-and-destroy for the term “VMware” in the registry. Stick strictly to the keys listed above to avoid breaking other applications.
Troubleshooting vSphere Client Timeouts: “The remote server took too long to respond” | Lazy Admin Blog

If you are seeing the error “The request failed because the remote server [vCenter Name/IP] took too long to respond” specifically when checking the Storage View of a VM or Datacenter, you are likely hitting a timeout related to Single Sign-On (SSO) authentication latency.
🛠️ The Quick Fix: Manual Login
The most common trigger for this timeout is using the “Use Windows Session Credentials” checkbox during login. While convenient, this pass-through method often fails to communicate efficiently with SSO when complex domain trusts are involved.
To solve this immediately:
- Log out of the vSphere client.
- Manually type your username (e.g.,
domain\useroruser@domain.com) and password. - Do not check the “Use Windows Session Credentials” box.
🏗️ The Permanent Fix: Identity Source Configuration
If manual login works but you want to restore the functionality of session credentials, the issue lies in how vCenter communicates with your external domains.
1. Adding External Domains
Ensure your Active Directory or LDAP identity sources are correctly configured. Refer to VMware KB 2035510 for the specific procedure on adding external domains to the SSO identity sources.
2. Default Domain Order
Even if a domain is added, if it is low on the priority list, the search request may time out before finding the user.
- Log into the vSphere Web Client as an SSO Administrator (
administrator@vsphere.local). - Navigate to Administration > Single Sign-On > Configuration.
- Go to the Identity Sources tab.
- Add your trusted domains to the Default Domains list.
- Reorder the domains: Move your most frequently used production domain to the top of the list.
- Save the configuration.
- ← Previous
- 1
- 2
- 3
- 4
- Next →